Month: November 2023

Fall Creations: Crafting Delightful Fall Crafts for Adults

Source : https://hips.hearstapps.com

Welcome to Fall Creations! Here, we specialize in crafting delightful fall crafts for adults. Whether you’re looking for a fun way to decorate your home for the season or a unique gift for a friend, we have something for everyone. Our crafts are designed to be easy to make and enjoyable to create. We use only the highest quality materials and our projects are sure to bring a smile to your face. So, grab your supplies and get ready to craft some delightful fall creations!

Get Creative with Fall Crafts: Ideas for Adults to Enjoy the Season

As the days grow shorter and the temperatures drop, it’s time to start thinking about ways to enjoy the fall season. Crafting is a great way to get creative and make something special to commemorate the season. Here are some ideas for adults to get creative with fall crafts.

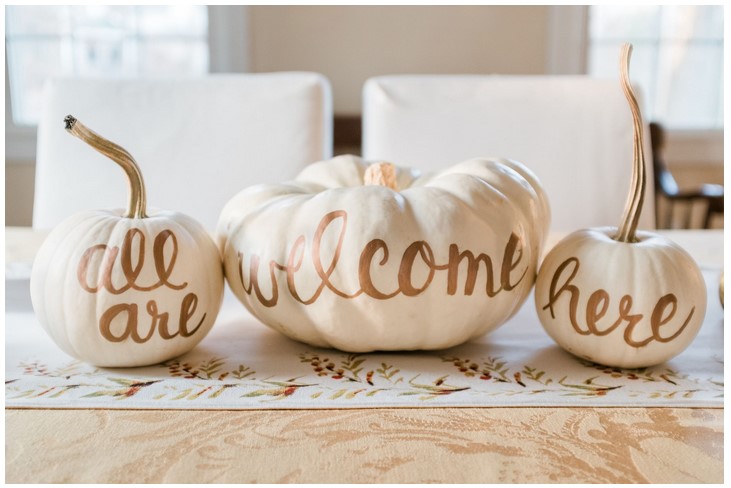
1. Decorative Gourds: Gourds are a classic fall decoration, and they can be used to make a variety of crafts. Try painting them with fall colors, or use them to make a festive centerpiece.

2. Wreaths: Wreaths are a great way to add a touch of fall to your home. Try making a wreath out of dried leaves, pinecones, and other natural materials.

3. Candles: Candles are a great way to add a cozy atmosphere to any room. Try making your own candles with fall-scented essential oils, or use fall-themed molds to make unique shapes.

4. Fall-Themed Art: Get creative with fall-themed art. Try painting a landscape with fall colors, or make a collage of fall leaves.

5. Fall-Themed Jewelry: Jewelry is a great way to show off your style. Try making your own fall-themed jewelry with beads, charms, and other materials.

6. Fall-Themed Decorations: Decorations are a great way to add a festive touch to any room. Try making your own fall-themed decorations with paper, fabric, and other materials.

7. Fall-Themed Gifts: Gifts are a great way to show someone you care. Try making your own fall-themed gifts with homemade items such as candles, jewelry, and decorations.

These are just a few ideas for adults to get creative with fall crafts. With a little creativity and some basic supplies, you can make something special to commemorate the season.

Crafting with Nature: How to Make Fall-Themed Decorations with Natural Materials

As the days grow shorter and the leaves begin to change, it’s time to start thinking about how to decorate your home for the fall season. With a little creativity and some natural materials, you can create beautiful decorations that will bring the beauty of the outdoors into your home. Here are some ideas for crafting with nature to make fall-themed decorations.

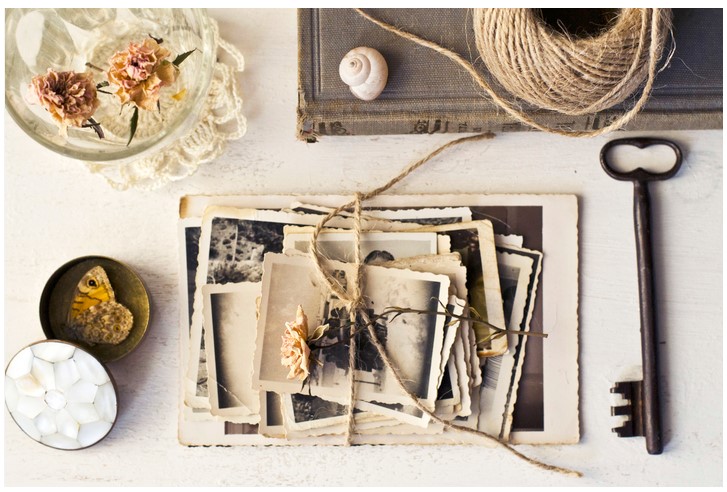
One of the simplest ways to decorate for fall is to gather leaves and press them between two pieces of wax paper. Once the leaves are pressed, you can use them to make cards, bookmarks, or even framed artwork. You can also use the leaves to make a wreath for your front door. Simply gather a bundle of leaves and tie them together with a piece of twine or ribbon.

Another great way to decorate for fall is to make a garland of acorns. Gather a handful of acorns and string them together with a piece of twine or ribbon. Hang the garland on your mantel or around a doorway for a festive touch.

If you’re looking for a more permanent decoration, you can make a fall-themed centerpiece using pinecones, acorns, and other natural materials. Start by gathering a variety of pinecones, acorns, and other natural materials. Arrange them in a bowl or basket and add a few candles for a warm, inviting glow.

Finally, you can make a fall-themed wreath for your front door. Start by gathering a bundle of twigs and tying them together with a piece of twine or ribbon. Then, add pinecones, acorns, and other natural materials to the wreath. Hang the wreath on your front door for a festive touch.

With a little creativity and some natural materials, you can create beautiful decorations that will bring the beauty of the outdoors into your home. Crafting with nature is a great way to get into the spirit of the season and make your home look and feel cozy and inviting.

Conclusion

Fall Creations is a great way to get creative and have fun while crafting delightful fall crafts for adults. With a variety of projects to choose from, there is something for everyone. Whether you are looking for a fun way to decorate your home or a unique gift for a friend, Fall Creations has something for you. With easy-to-follow instructions and materials that are easy to find, you can create beautiful and unique crafts that will bring joy to your home and to those around you.

Shelf Schemes: Mastering DIY Shelving for Stylish Storage

Source : https://www.coolthings.com

Shelf schemes are a great way to add stylish storage to any room in your home. Whether you’re looking to create a modern look in your living room, or a more traditional look in your bedroom, shelf schemes can help you achieve the look you’re after. With a few simple tools and materials, you can create a custom shelving system that will fit your space perfectly. In this guide, we’ll cover the basics of shelf schemes, from the materials you’ll need to the different types of shelves available. We’ll also provide tips and tricks for creating a stylish and functional shelf scheme that will last for years to come.

How to Create a Custom DIY Shelving System for Your Home: Tips and Tricks for Maximizing Storage Space

Creating a custom diy shelving system for your home can be a great way to maximize storage space and make your home look more organized. With a few simple tips and tricks, you can create a shelving system that is both functional and aesthetically pleasing.

First, decide on the type of shelving system you want to create. There are many different types of shelving systems available, including wall-mounted, freestanding, and corner shelves. Consider the size and shape of the space you have available, as well as the items you plan to store on the shelves. This will help you determine the best type of shelving system for your needs.

Next, measure the space you have available for the shelving system. This will help you determine the size and number of shelves you need. Make sure to leave enough space between shelves for items to fit comfortably.

Once you have determined the size and type of shelving system you need, it’s time to start shopping for materials. You can find shelving materials at most home improvement stores, as well as online. Make sure to purchase materials that are strong and durable enough to hold the items you plan to store.

When it comes to installation, it’s important to follow the instructions provided with the shelving system. If you’re not comfortable with the installation process, you may want to hire a professional to do the job for you.

Finally, once your shelving system is installed, it’s time to start organizing your items. Consider using baskets, bins, and other containers to help keep items organized and easy to find. You can also use labels to help you remember where items are located.

By following these tips and tricks, you can create a custom diy shelving system for your home that is both functional and aesthetically pleasing. With a little bit of planning and effort, you can maximize your storage space and make your home look more organized.

Get Creative with DIY Shelving: Ideas for Stylish and Functional Storage Solutions

diy shelving is a great way to add stylish and functional storage solutions to any home. Whether you’re looking to create a unique display for your favorite items or need extra storage space for books and other items, diy shelving can be a great way to get creative and make the most of your space. Here are some ideas for stylish and functional diy shelving solutions.

Floating Shelves: Floating shelves are a great way to add storage without taking up too much space. They can be used to display books, plants, and other decorative items. To create a floating shelf, you’ll need a piece of wood, some brackets, and screws. Measure the space you want to use and cut the wood to size. Attach the brackets to the wall and then attach the shelf to the brackets.

Pegboard Shelves: Pegboard shelves are a great way to add storage and display items in a unique way. You can use pegboard to create shelves for books, plants, and other items. To create a pegboard shelf, you’ll need a piece of pegboard, some brackets, and screws. Measure the space you want to use and cut the pegboard to size. Attach the brackets to the wall and then attach the pegboard to the brackets.

Hanging Shelves: Hanging shelves are a great way to add storage without taking up too much space. They can be used to display books, plants, and other decorative items. To create a hanging shelf, you’ll need a piece of wood, some brackets, and screws. Measure the space you want to use and cut the wood to size. Attach the brackets to the wall and then attach the shelf to the brackets.

These are just a few ideas for stylish and functional diy shelving solutions. With a little creativity and some basic tools, you can create a unique storage solution that fits your needs and style.

Conclusion

Shelf schemes are an excellent way to add stylish storage to any home. They are easy to install, affordable, and can be customized to fit any space. With a little bit of creativity and some basic DIY skills, you can create a unique and functional shelf scheme that will add style and storage to your home. Whether you are looking for a simple shelf to store books or a more complex shelving system to organize your belongings, shelf schemes are a great way to make the most of your space.

Antiquated Charm: How to Antique Paper for Vintage Appeal

Source : https://cf.ltkcdn.net

Antiquated Charm is a great way to add a vintage appeal to your paper projects. Whether you’re creating a scrapbook, a journal, or a handmade card, antiquing your paper can give it a unique and timeless look. With a few simple steps, you can easily antique your paper to give it an aged, rustic feel. From using tea bags to distress the paper to using a variety of inks and paints to create a weathered look, there are many ways to antique paper. With a little bit of creativity and patience, you can create a beautiful, one-of-a-kind piece of art.

How to Create an Antique Look for Your Paper Crafts: Tips and Techniques for Achieving an Antiquated Charm

Creating an antique look for your paper crafts can be a great way to add a unique charm to your projects. Whether you’re making cards, scrapbooks, or other paper crafts, there are a few tips and techniques you can use to achieve an antiquated look.

First, consider the type of paper you’re using. For a truly antique look, use a heavier weight paper, such as cardstock or watercolor paper. This will give your project a more substantial feel and will help it stand the test of time. You can also use vintage paper, such as old book pages or newspaper clippings, to add an extra layer of authenticity.

Next, consider the colors you’re using. To achieve an antique look, opt for muted tones such as browns, tans, and grays. You can also use sepia tones to give your project an aged feel.

Finally, consider the embellishments you’re using. To add an antique touch, use vintage buttons, lace, ribbons, and other trinkets. You can also use stamps, stickers, and other papercrafting supplies to give your project a unique look.

By following these tips and techniques, you can easily create an antique look for your paper crafts. With a little bit of creativity and some vintage supplies, you can give your projects a timeless charm.

Adding a Touch of History to Your Projects: Using Antique Paper to Enhance Your Artwork and Crafts

Adding a touch of history to your projects can be a great way to enhance your artwork and crafts. Using antique paper is a great way to do this. Antique paper is paper that is over 100 years old and has a unique look and feel that can add a special touch to any project.

When using antique paper, it is important to consider the age and condition of the paper. Older paper may be more fragile and may require special handling. It is also important to consider the type of paper you are using. Different types of paper have different characteristics and can be used for different purposes. For example, some antique paper may be too fragile for use in a scrapbook, but may be perfect for use in a collage.

When using antique paper, it is important to take into account the colors and patterns of the paper. Antique paper often has a unique look and feel that can add a special touch to any project. It is also important to consider the size of the paper. Some antique paper may be too small for use in a scrapbook, but may be perfect for use in a collage.

When using antique paper, it is important to take into account the type of project you are working on. Different types of projects may require different types of paper. For example, some antique paper may be too fragile for use in a scrapbook, but may be perfect for use in a collage.

Using antique paper can be a great way to add a touch of history to your projects. It can add a unique look and feel to any project and can be used in a variety of ways. When using antique paper, it is important to consider the age and condition of the paper, the colors and patterns of the paper, and the type of project you are working on. With careful consideration, antique paper can be a great way to enhance your artwork and crafts.

Conclusion

Antiquated Charm is a great way to add a vintage appeal to any paper project. With a few simple steps, you can easily create a unique and beautiful piece of art that will stand out from the crowd. Whether you are looking to add a touch of nostalgia to a scrapbook page or create a one-of-a-kind invitation, antiquing paper is a great way to make your project stand out. With a little bit of creativity and a few simple supplies, you can easily create a timeless piece of art that will be cherished for years to come.