Month: November 2023

Literary Magic: Creating In-Wall Bookshelves for Your Treasured Books

Source : https://th-i.thgim.com

Welcome to the world of literary magic! If you’re a book lover, you know that books are more than just words on a page. They’re a source of knowledge, inspiration, and comfort. But if you’re like most book lovers, you’ve probably struggled to find the perfect way to store and display your treasured books. That’s where in-wall bookshelves come in. In-wall bookshelves are a great way to store and display your books in a way that’s both aesthetically pleasing and practical. In this guide, we’ll discuss the basics of creating in-wall bookshelves for your treasured books, from the materials you’ll need to the steps you’ll need to take to get the job done. So, let’s get started and create some literary magic!

How to Create a Magical In-Wall Bookshelf for Your Favorite Literary Works

Creating an in-wall bookshelf for your favorite literary works can be a magical experience. Not only will it provide a unique and stylish way to display your favorite books, but it will also add a touch of charm to any room. Here are the steps to create a magical in-wall bookshelf for your favorite literary works.

1. Choose the location for your bookshelf. Consider the size of the wall and the amount of books you plan to store. Make sure the area is free of any electrical wiring or plumbing.

2. Measure the wall and mark the area where you want to install the bookshelf. Use a level to ensure the shelf is even.

3. Cut the drywall to fit the size of the shelf. Use a drywall saw to make the cuts.

4. Install the shelf brackets. Use a drill to secure the brackets to the wall.

5. Place the shelf on the brackets and secure it with screws.

6. Paint the shelf to match the color of the wall.

7. Place your favorite books on the shelf and enjoy your new magical in-wall bookshelf.

Creating an in-wall bookshelf for your favorite literary works is a great way to add a touch of charm to any room. With a few simple steps, you can create a magical in-wall bookshelf that will be the perfect place to store and display your favorite books.

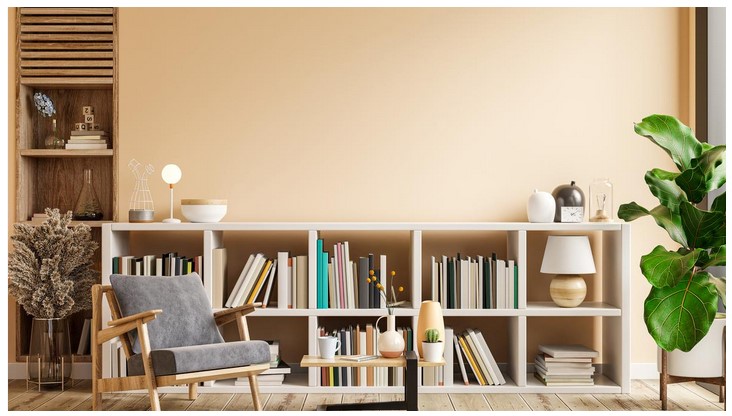
The Benefits of Installing an In-Wall Bookshelf for Your Literary Collection

The installation of an in-wall bookshelf is an excellent way to store and display your literary collection. This type of shelving offers a number of benefits that make it an ideal choice for any book lover.

First, an in-wall bookshelf is a great way to maximize the use of space. By installing the shelf directly into the wall, you can make use of otherwise unused space and create a more organized and efficient storage solution. This type of shelving also allows you to display your books in a more aesthetically pleasing way, as the books are visible from both sides of the shelf.

Second, an in-wall bookshelf is a great way to protect your books from damage. By installing the shelf directly into the wall, you can ensure that your books are safe from dust, dirt, and other environmental factors that can cause damage over time. Additionally, the shelf can be securely mounted to the wall, making it difficult for anyone to remove the books without your permission.

Finally, an in-wall bookshelf is a great way to add a touch of style to your home. This type of shelving can be customized to fit any décor, allowing you to create a unique and attractive display for your books. Additionally, the shelf can be painted or stained to match the existing color scheme of your home.

In conclusion, an in-wall bookshelf is an excellent way to store and display your literary collection. This type of shelving offers a number of benefits, including maximizing the use of space, protecting your books from damage, and adding a touch of style to your home. For any book lover, an in-wall bookshelf is an ideal choice.

Conclusion

Literary Magic: Creating In-Wall Bookshelves for Your Treasured Books is a great way to add a unique and personal touch to any home. Not only does it provide a great way to store and display your favorite books, but it also adds a touch of charm and sophistication to any room. With a few simple tools and materials, anyone can create a beautiful and functional in-wall bookshelf that will last for years to come.

Emerald Elegance: Elevating Your Space with Green Kitchen Cabinets

Source : www.google.com

Welcome to Emerald Elegance, the premier source for green kitchen cabinets. We specialize in elevating your space with the perfect shade of green to bring a unique and stylish look to your kitchen. Our cabinets are made from the highest quality materials and are designed to last for years to come. We offer a wide variety of styles and colors to choose from, so you can find the perfect look for your kitchen. Whether you’re looking for a classic look or something more modern, we have the perfect green kitchen cabinets for you. With our expert design team, we can help you create the perfect kitchen that you’ll love for years to come.

How to Incorporate Emerald Elegance into Your Kitchen Design: Tips for Choosing the Right Green Kitchen Cabinets

When it comes to kitchen design, emerald green is a timeless and elegant choice. Whether you’re looking to create a classic look or a modern, contemporary feel, emerald green kitchen cabinets can be the perfect way to add a touch of sophistication to your space. Here are some tips for choosing the right green kitchen cabinets to incorporate emerald elegance into your kitchen design.

1. Consider the Color Palette: When selecting emerald green kitchen cabinets, it’s important to consider the overall color palette of your kitchen. If you’re looking to create a classic look, opt for a neutral color palette with white, beige, or gray walls and countertops. For a more modern feel, pair the emerald green cabinets with bold colors like navy blue, black, or even pink.

2. Choose the Right Finish: The finish of your kitchen cabinets can make a big difference in the overall look and feel of your kitchen. For a classic look, opt for a glossy finish that will reflect light and create a bright, airy feel. For a more modern look, choose a matte finish that will give the cabinets a more subtle, sophisticated look.

3. Consider the Hardware: The hardware you choose for your emerald green kitchen cabinets can also make a big difference in the overall look and feel of your kitchen. For a classic look, opt for brass or gold hardware. For a more modern feel, choose sleek, contemporary hardware in black or silver.

4. Add Accent Pieces: To complete the look, add some accent pieces in complementary colors. For a classic look, choose pieces in shades of white, beige, or gray. For a more modern feel, opt for pieces in bold colors like navy blue, black, or pink.

By following these tips, you can easily incorporate emerald elegance into your kitchen design. With the right green kitchen cabinets, you can create a timeless and sophisticated look that will be sure to impress.

Transform Your Kitchen with Emerald Elegance: A Guide to Installing Green Kitchen Cabinets

Are you looking to transform your kitchen with a touch of emerald elegance? green kitchen cabinets can be a great way to add a unique and stylish look to your home. With the right installation and design, you can create a beautiful and inviting space that will be the envy of your friends and family.

To get started, you’ll need to decide on the type of green kitchen cabinets you want to install. There are a variety of options available, from traditional wood cabinets to modern laminate or metal cabinets. You’ll also need to consider the size and shape of your kitchen, as well as the overall style you’re trying to achieve. Once you’ve chosen the type of cabinets you want, you can begin the installation process.

The first step is to measure the area where you plan to install the cabinets. This will help you determine the size and shape of the cabinets you need. You’ll also need to measure the walls and ceiling to ensure that the cabinets will fit properly. Once you have the measurements, you can begin to shop for the cabinets.

When shopping for green kitchen cabinets, look for cabinets that are made from high-quality materials. You’ll also want to consider the color and finish of the cabinets. If you’re looking for a more traditional look, you may want to choose wood cabinets. For a more modern look, you may want to opt for laminate or metal cabinets.

Once you’ve chosen the cabinets, you’ll need to install them. This process can be a bit tricky, so it’s important to follow the instructions carefully. You’ll need to make sure that the cabinets are level and secure, and that all of the hardware is properly installed. If you’re not comfortable with the installation process, you may want to hire a professional to do the job for you.

Once the cabinets are installed, you can begin to accessorize your kitchen. Consider adding green accents such as countertops, backsplashes, and lighting fixtures. You can also add green accents to the walls and floors, such as wallpaper or tile. With the right accessories, you can create a beautiful and inviting space that will be the envy of your friends and family.

Installing green kitchen cabinets can be a great way to transform your kitchen with a touch of emerald elegance. With the right installation and design, you can create a beautiful and inviting space that will be the envy of your friends and family. With a little bit of planning and effort, you can create a kitchen that you’ll be proud to show off.

Conclusion

Emerald Elegance is a great way to add a touch of luxury and sophistication to any kitchen. With its bold and vibrant color, it can instantly transform a space and make it feel more inviting and luxurious. The green kitchen cabinets are also incredibly durable and easy to maintain, making them a great choice for any kitchen. Whether you’re looking to make a statement or just want to add a touch of elegance to your kitchen, Emerald Elegance is the perfect choice.

Fun Factory: Creative and Exciting Fun Project Ideas for Home

Source : https://www.thesprucecrafts.com

Welcome to Fun Factory! We are a creative and exciting fun project ideas provider for home. Our mission is to provide you with the best ideas for fun projects that you can do at home. We have a wide variety of projects that range from simple crafts to more complex projects. Whether you are looking for something to do with your family or just want to have some fun, we have something for everyone. We also provide tips and tricks to help you get the most out of your projects. So, let’s get started and have some fun!

10 Fun and Creative DIY Projects for Kids to Enjoy at Home

1. Make a Puppet Theater: Create a puppet theater out of a cardboard box and some fabric. Let your kids use their imaginations to create their own characters and stories.

2. Create a Marble Maze: Use a cardboard box and some marbles to create a fun and challenging maze.

3. Paint Rocks: Collect some rocks from the backyard and let your kids paint them with bright colors and designs.

4. Make a Bird Feeder: Use a plastic bottle and some birdseed to make a bird feeder. Hang it up in the backyard and watch the birds come to eat.

5. Create a Mini Garden: Plant some flowers or vegetables in a pot and let your kids take care of it.

6. Make a Cardboard Castle: Use cardboard boxes and some paint to create a castle. Let your kids use their imaginations to decorate it.

7. Create a Scavenger Hunt: Hide some items around the house and create a list of clues for your kids to find them.

8. Make a Paper Airplane: Fold a piece of paper into a paper airplane and let your kids fly it around the house.

9. Build a Fort: Use blankets and chairs to create a fort in the living room.

10. Paint with Water: Fill a bucket with water and let your kids use paintbrushes to paint the walls or the sidewalk.

How to Create a Fun Factory at Home: Tips and Ideas for a Fun and Engaging Environment

Creating a fun factory at home can be a great way to keep children entertained and engaged. It can also be a great way to encourage creativity and learning. Here are some tips and ideas for creating a fun and engaging environment at home.

1. Set up a designated play area. Designate a specific area in your home for playtime. This could be a corner of the living room, a playroom, or even a section of the backyard. Make sure the area is well-stocked with toys, books, and other activities.

2. Encourage imaginative play. Provide toys and materials that encourage imaginative play. This could include dress-up clothes, blocks, dolls, and other items that can be used to create stories and scenarios.

3. Get creative with crafts. Crafts are a great way to keep kids engaged and entertained. Provide materials such as paper, glue, markers, and other items that can be used to create art projects.

4. Incorporate educational activities. Incorporate educational activities into playtime. This could include puzzles, board games, and other activities that help to develop problem-solving skills.

5. Make it fun. Make sure the environment is fun and engaging. This could include playing music, having a dance party, or playing games.

Creating a fun factory at home can be a great way to keep children entertained and engaged. With the right materials and activities, you can create an environment that encourages creativity and learning.

Conclusion

Fun Factory is a great resource for parents and teachers looking for creative and exciting fun project ideas for home. It provides a wide variety of activities that are both educational and entertaining. The projects are easy to follow and can be adapted to fit any age group. Fun Factory is a great way to keep kids engaged and entertained while learning something new.

Copper Craft: Designing a Penny Counter for a Unique Kitchen Feature

Source : https://i.pinimg.com

Copper Craft is a company that specializes in creating unique and stylish kitchen features. Their signature product is the penny counter, a unique countertop made from copper pennies. The penny counter is designed to be a beautiful and functional addition to any kitchen. It is a great way to add a unique touch to your kitchen while also providing a practical and useful surface. Copper Craft’s penny counter is made from high-quality copper pennies that are carefully arranged in a pattern to create a unique and eye-catching design. The penny counter is a great way to add a touch of style and sophistication to your kitchen.

How to Create a Stylish Penny Counter for Your Kitchen: Tips and Tricks for Crafting a Unique Copper Feature

Creating a stylish penny counter for your kitchen is a great way to add a unique copper feature to your home. Whether you’re looking to add a touch of rustic charm or a modern industrial feel, a penny counter can be the perfect addition to your kitchen. Here are some tips and tricks to help you craft a beautiful penny counter for your kitchen.

First, you’ll need to decide on the size and shape of your penny counter. Measure the area where you plan to install the counter and determine the size and shape that will best fit the space. You can also choose to create a custom shape to fit the area.

Next, you’ll need to gather the materials for your penny counter. You’ll need copper pennies, a sealant, a sealant applicator, a saw, and a drill. You’ll also need a level, a measuring tape, and a hammer.

Once you have all the materials, you’ll need to prepare the area where you plan to install the penny counter. Make sure the area is clean and free of debris. Then, use the measuring tape and level to mark the area where you plan to install the counter.

Now it’s time to start laying out the pennies. Begin by laying out the pennies in the shape of your counter. Make sure the pennies are evenly spaced and that the edges are flush. Once you’ve laid out the pennies, use the saw to cut the pennies to the desired size.

Once the pennies are cut, use the drill to make holes in the pennies. This will allow you to attach the pennies to the counter. Use the hammer to tap the pennies into place.

Finally, use the sealant and sealant applicator to seal the pennies. This will help protect the pennies from moisture and ensure that your penny counter will last for years to come.

Creating a stylish penny counter for your kitchen is a great way to add a unique copper feature to your home. With these tips and tricks, you can craft a beautiful penny counter that will be the perfect addition to your kitchen.

Copper Craft: Exploring the Benefits of Using Copper for Your Penny Counter Design

Copper is a popular choice for penny counter designs due to its many benefits. Copper is a durable and malleable metal, making it an ideal material for crafting penny counters. It is also resistant to corrosion, making it a great choice for long-term use. Copper is also a great conductor of electricity, making it a great choice for penny counters that require electrical components.

The malleability of copper makes it easy to shape and form into intricate designs. This makes it a great choice for penny counters that require intricate details. Copper can also be easily polished to a high shine, giving penny counters a beautiful and eye-catching finish.

Copper is also a great choice for penny counters due to its affordability. Copper is a relatively inexpensive metal, making it a great choice for penny counters that are on a budget. Copper is also easy to find, making it a great choice for penny counters that need to be made quickly.

Finally, copper is a great choice for penny counters due to its antimicrobial properties. Copper has been shown to have antimicrobial properties, making it a great choice for penny counters that will be used in areas with high levels of bacteria. This makes copper a great choice for penny counters that will be used in areas such as hospitals and restaurants.

In conclusion, copper is a great choice for penny counter designs due to its many benefits. Copper is a durable and malleable metal, making it an ideal material for crafting penny counters. It is also resistant to corrosion, making it a great choice for long-term use. Copper is also a great conductor of electricity, making it a great choice for penny counters that require electrical components. Copper is also an affordable and easy to find metal, making it a great choice for penny counters that are on a budget. Finally, copper has antimicrobial properties, making it a great choice for penny counters that will be used in areas with high levels of bacteria.

Conclusion

Copper Craft’s penny counter is a great way to add a unique and stylish touch to any kitchen. It is easy to install and provides a great way to keep track of your coins. The penny counter is a great way to add a touch of style and sophistication to any kitchen. With its unique design and easy installation, it is sure to be a great addition to any kitchen.

Poolside Calculations: Understanding In-Ground Pool Cost Estimations

Source : https://www.familyleisuremedia.com

Poolside Calculations: Understanding In-Ground Pool Cost Estimations is a comprehensive guide to understanding the cost of installing an in-ground pool. This guide will provide you with the information you need to make an informed decision about the cost of your pool. It will cover the different types of pools, the cost of materials, labor, and other factors that can affect the cost of your pool. It will also provide tips and advice on how to save money when installing an in-ground pool. With this guide, you will be able to make an educated decision about the cost of your pool and be able to enjoy it for years to come.

How to Use an In-Ground Pool Cost Estimator to Accurately Calculate Your Poolside Investment

An in-ground pool cost estimator is a valuable tool for anyone considering investing in a pool. It can help you accurately calculate the cost of your poolside investment and ensure that you are making a wise financial decision. Here is how to use an in-ground pool cost estimator to accurately calculate your poolside investment.

First, you will need to gather all the necessary information. This includes the size of the pool, the type of pool, the materials you plan to use, and any additional features you may want to include. You will also need to consider the cost of installation, which can vary depending on the complexity of the project.

Once you have all the necessary information, you can begin using the in-ground pool cost estimator. This tool will ask you to input the information you have gathered and will then generate an estimate of the total cost of your poolside investment.

The estimator will also provide you with a breakdown of the costs associated with each component of the project. This includes the cost of the pool, the cost of installation, and any additional features you may want to include. This breakdown will help you understand the total cost of your poolside investment and make sure that you are making a wise financial decision.

Finally, you can use the in-ground pool cost estimator to compare the cost of your poolside investment to other options. This will help you determine if you are getting the best value for your money.

Using an in-ground pool cost estimator is a great way to accurately calculate the cost of your poolside investment. By gathering all the necessary information and using the estimator, you can ensure that you are making a wise financial decision and getting the best value for your money.

Exploring the Different Factors That Impact In-Ground Pool Cost Estimations and How to Account for Them

In-ground pools are a great way to add value to your home and provide a fun and relaxing outdoor space for your family and friends. However, the cost of installing an in-ground pool can vary greatly depending on a variety of factors. Understanding these factors and how to account for them can help you get a better estimate of the cost of your in-ground pool.

The first factor to consider when estimating the cost of an in-ground pool is the size and shape of the pool. The larger and more complex the pool, the more expensive it will be. Additionally, the type of material used to construct the pool will also affect the cost. Concrete pools are typically more expensive than vinyl-lined pools, but they are also more durable and require less maintenance.

The location of the pool is another important factor to consider. If the pool is located in an area with a high water table, it may require additional excavation and drainage work, which can add to the cost. Additionally, if the pool is located in an area with a lot of trees or other obstacles, it may require additional excavation and construction work to make the area suitable for a pool.

The type of equipment and features you choose for your pool will also affect the cost. If you want a pool with a diving board, slide, or other features, these will add to the cost. Additionally, the type of filtration system you choose will also affect the cost.

Finally, the cost of labor and installation will also affect the cost of your in-ground pool. If you choose to hire a professional to install your pool, this will add to the cost. Additionally, if you choose to do the installation yourself, you may need to purchase additional tools and materials, which can also add to the cost.

By understanding the different factors that impact in-ground pool cost estimations and how to account for them, you can get a better idea of the total cost of your in-ground pool. This will help you make an informed decision about whether or not an in-ground pool is the right choice for your home.

Conclusion

In conclusion, Poolside Calculations: Understanding In-Ground Pool Cost Estimations is an invaluable resource for anyone considering installing an in-ground pool. It provides a comprehensive overview of the various factors that go into estimating the cost of an in-ground pool, from the initial design and construction to the ongoing maintenance and upkeep. With this information, homeowners can make informed decisions about their pool investment and ensure that they get the most out of their pool for years to come.