Source : https://i.ytimg.com
If you’re someone who loves crafting and enjoys upcycling materials, then a bottle cutter is a tool you should consider adding to your collection. The bottle cutter from Michaels offers a fantastic way to transform ordinary glass bottles into beautiful, functional items. Whether you’re looking to create artistic decorations or practical home goods, a bottle cutter from Michaels opens up a world of possibilities for your DIY projects. In this article, we’ll explore various craft ideas and projects you can create using a bottle cutter and how it can enhance your creative endeavors.
1. Understanding the Bottle Cutter and Its Uses
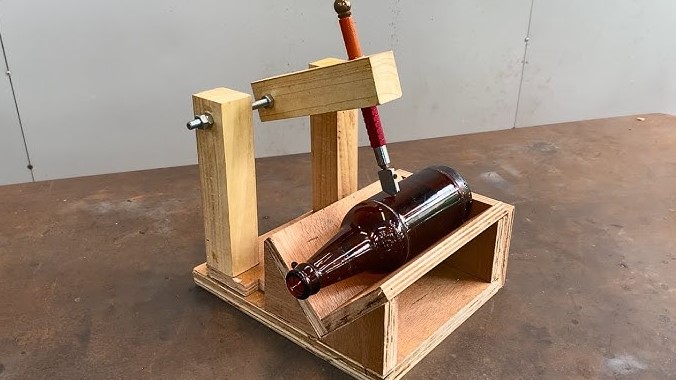
Before diving into specific craft projects, it’s important to understand what a bottle cutter is and how it works. A bottle cutter is a tool designed to score and cut glass bottles, enabling you to repurpose them for a variety of uses. The cutter typically has a scoring wheel that creates a line around the bottle, which is then carefully separated through the application of heat and cold.
The tool is especially popular for crafting because it allows you to turn discarded bottles into creative and functional pieces. Michaels offers several different models, from simple, easy-to-use cutters to more advanced ones with adjustable features for custom cuts. No matter the model, using a bottle cutter can significantly reduce the amount of waste, and it offers a creative way to give old bottles a new life.
Subheading: The Right Bottles for Cutting
While you can technically cut any type of glass bottle, certain types work better than others. Standard glass bottles such as wine bottles, beer bottles, and soda bottles are all excellent choices for cutting. These bottles tend to have a uniform thickness and can withstand the cutting process with ease. Avoid bottles with thick or heavily textured glass as they may not cut as cleanly. Also, it’s essential to ensure the bottles are thoroughly cleaned before starting your project to avoid any complications during the cutting process.
2. Creative Craft Projects Using a Bottle Cutter Michaels
Once you have your bottle cutter ready, the possibilities for crafting are nearly endless. Here are a few fun and functional project ideas that you can try using your bottle cutter from Michaels.
- Glass Jar Lanterns: Turn wine or beer bottles into charming lanterns. After cutting the bottles, smooth the edges with sandpaper to remove any sharp parts. Add candles or fairy lights inside the bottles to create a cozy ambiance for your home or patio. These lanterns work beautifully for outdoor gatherings or as decorative accents in your living room.
- Vases and Planters: Cutting bottles into vases or planters is an easy way to create unique home decor. A bottle cutter Michaels will allow you to make clean cuts, resulting in modern, chic vases that are perfect for displaying flowers or small plants. You can leave the bottles as-is for a minimalist look, or paint and decorate them to match your home’s color scheme. This project is a great way to showcase your DIY skills while adding a personal touch to your decor.
- Glass Tumblers and Drinking Glasses: Repurposing bottles into drinking glasses is a fantastic way to reduce waste while creating something functional. After cutting the bottles to the desired height, you can smooth the edges and polish the glass for a refined look. You can also add custom designs or paint the glasses for an even more personalized touch. This project is perfect for making unique gifts or creating a set of one-of-a-kind glassware for your own home.
- Picture Frames: Another creative use for your bottle cutter Michaels is turning cut bottles into picture frames. This project involves cutting the bottles at a slight angle, allowing you to attach them together in a frame shape. You can then place your favorite photos or artwork inside the frame. Whether it’s for a family photo, a travel memento, or a piece of art, this project adds a creative flair to your home decor.
- Wall Art and Sculptures: Bottles can also be used to create stunning wall art or sculptures. By cutting the bottles into various shapes, sizes, and colors, you can arrange them into eye-catching patterns. Whether you want to create a textured mosaic, a vertical garden, or a modern sculpture, the versatility of cut glass allows you to explore your creativity. Using a bottle cutter, you can even integrate other materials, such as wood or metal, for added texture and depth.
Subheading: Safety Tips When Using a Bottle Cutter
While using a bottle cutter is generally safe, there are some important safety precautions to keep in mind:
- Wear Protective Gear: Always wear safety glasses to protect your eyes from any glass shards, and consider using gloves to prevent cuts.
- Work on a Stable Surface: Ensure the bottle is securely placed before you begin cutting. A stable work surface will help keep the bottle steady, ensuring a smoother cut.
- Sand the Edges: After cutting, always smooth the edges of the glass with sandpaper or a specialized tool to avoid sharp edges that could cause injury.
- Take Your Time: Be patient and gentle with the cutting process. Rushing can lead to uneven cuts or breakage, so it’s important to work slowly and carefully.
3. Benefits of Using a Bottle Cutter Michaels for Crafting
Aside from the obvious environmental benefits of repurposing glass bottles, there are several reasons why using a bottle cutter from Michaels is a fantastic option for crafters.
- Affordable and Eco-Friendly: Repurposing glass bottles is a great way to reduce waste while keeping your crafting projects affordable. Instead of purchasing new materials for each project, you can reuse bottles and create beautiful, one-of-a-kind items.
- Encourages Creativity: The bottle cutter encourages experimentation with different designs, colors, and forms. Whether you want to create something functional like a glass tumbler or get artistic with sculptures and wall art, a bottle cutter can be a versatile tool for bringing your ideas to life.
- Customizable Projects: Using a bottle cutter gives you the freedom to make custom-sized pieces. Whether you need a small vase or a tall, elegant lantern, you can create exactly what you want without the restrictions of pre-made products.
- Gift-Worthy Creations: Many of the items you create using a bottle cutter, such as glasses, vases, and lanterns, make thoughtful and personal gifts. Customized bottle crafts are perfect for birthdays, holidays, or housewarming presents, adding a handmade touch to your gifts.
Subheading: Where to Get Your Bottle Cutter Michaels
Michaels offers a variety of bottle cutters for all skill levels, from beginner to advanced. You can easily find them in-store or online, and the staff can provide helpful guidance if you’re new to bottle crafting. Additionally, Michaels offers many other supplies you might need, such as paints, glues, and sandpaper, to help complete your projects.
Using a bottle cutter from Michaels opens up endless possibilities for creative and sustainable craft projects. Whether you’re repurposing bottles into lanterns, vases, drinking glasses, or wall art, the versatility of a bottle cutter allows you to explore a wide variety of design ideas. Not only will you be able to create beautiful, personalized pieces, but you’ll also be making a positive impact on the environment by reducing waste. So, if you’re looking for a fun and innovative way to craft, grab a bottle cutter Michaels, and start transforming ordinary glass bottles into extraordinary creations.