Source : https://cdn.prod.website-files.com
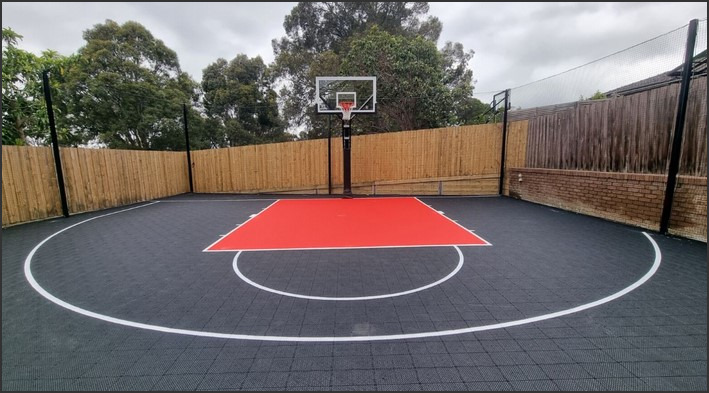
“Hoops and Dreams: How to Make a DIY Basketball Court” is a comprehensive guide that provides step-by-step instructions on creating a personal basketball court at home. This guide is designed for basketball enthusiasts who wish to bring the game closer to their doorstep. It covers everything from planning the court layout, selecting the right materials, preparing the ground, to painting the lines and installing the hoop. With this guide, you can transform your backyard or any suitable space into a functional basketball court, fostering an environment that encourages physical activity and the love for the sport.
What is Pergola: Incorporating it into Your DIY Basketball Court for Hoops and Dreams
Hoops and dreams often go hand in hand for many basketball enthusiasts. The thrill of the game, the camaraderie of the team, and the satisfaction of a well-executed play are all part of the allure. However, not everyone has access to a professional court. This is where the concept of a DIY basketball court comes into play. With a bit of creativity, some basic materials, and a dash of hard work, you can create your own basketball court right in your backyard. But why stop there? To add an extra touch of elegance and functionality, consider incorporating a pergola into your DIY basketball court design.
A pergola, for those unfamiliar with the term, is an outdoor garden feature forming a shaded walkway, passageway, or sitting area of vertical posts or pillars that usually support cross-beams and a sturdy open lattice. The origin of the pergola dates back to ancient Egyptian, Roman, and Greek civilizations, where they were commonly used in gardens to provide a shaded retreat from the sun. Today, pergolas are popular additions to outdoor spaces, providing both aesthetic appeal and practical benefits.
Incorporating a pergola into your DIY basketball court can serve multiple purposes. Firstly, it can provide a shaded area for players to rest and recuperate between games. This is particularly beneficial in hot climates, where the sun can be relentless. Secondly, a pergola can serve as a visual boundary, delineating the court area from the rest of your outdoor space. This can be particularly useful if you have a large backyard and want to create a dedicated space for basketball.
Creating a pergola as part of your DIY basketball court project is not as daunting as it may seem. The first step is to decide on the size and location of your pergola. It should be large enough to provide ample shade but not so large that it overshadows the court. The location should be convenient for players, ideally at one end of the court.
Once you have decided on the size and location, the next step is to gather your materials. You will need posts, beams, and lattice for the structure, as well as concrete for the footings. The choice of materials can vary depending on your budget and personal preference. Wood is a popular choice for its natural look and durability, but metal or vinyl can also be used.
The construction process involves setting the posts in concrete, attaching the beams to the posts, and then adding the lattice on top. It’s important to ensure that the structure is sturdy and secure, as it will need to withstand wind and weather. If you’re not confident in your construction skills, it may be worth hiring a professional to ensure the job is done correctly.
In conclusion, a pergola can be a valuable addition to your DIY basketball court. Not only does it provide a shaded area for players to rest, but it also adds a touch of elegance to your outdoor space. With some planning, the right materials, and a bit of hard work, you can create a basketball court that is not only functional but also aesthetically pleasing. So why not take your hoops and dreams to the next level by incorporating a pergola into your DIY basketball court design?

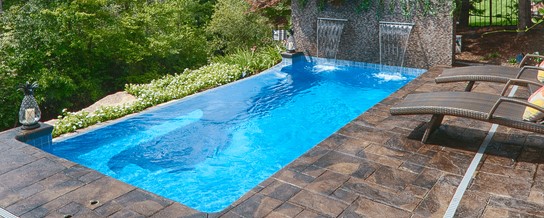 Welcome to Dive In: Exploring Small Inground Pools Cost for a Refreshing Backyard Retreat! If you’ve been dreaming of having a pool in your backyard, you’ve come to the right place. Here, we’ll explore the cost of small inground pools and the benefits they can bring to your home. We’ll discuss the different types of pools available, the cost of installation, and the maintenance required to keep your pool looking great. We’ll also provide tips on how to make the most of your pool and create a backyard oasis. So, let’s dive in and explore the possibilities of a small inground pool!