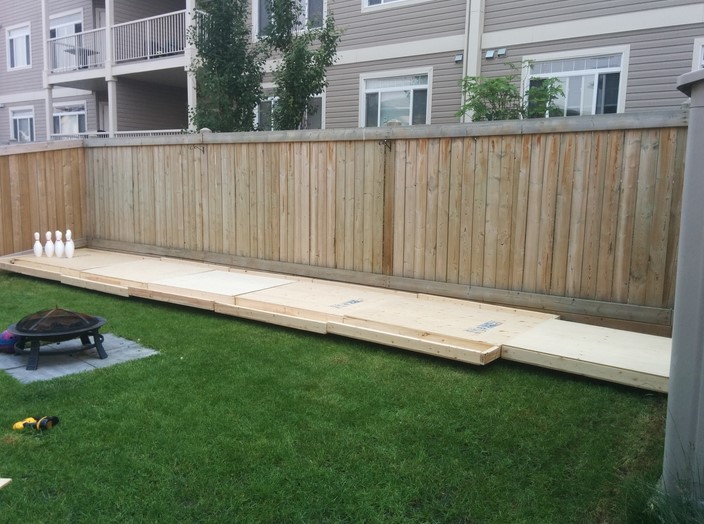
Source : https://www.simplemost.com
Introduction
In a world inundated with digital entertainment and fast-paced activities, sometimes there’s a longing for the simpler joys of life. Building a backyard bowling alley offers a fantastic opportunity to tap into your DIY skills and create a space that promotes outdoor fun, social interaction, and a sense of accomplishment. Constructing your own backyard bowling alley may seem like a daunting task, but with careful planning, dedication, and a bit of elbow grease, you can transform your outdoor space into a hub of enjoyment for family and friends.
Planning Phase: Lay the Foundation
Every successful DIY project starts with meticulous planning. Before you embark on the journey of building a backyard bowling alley, consider the following factors:
1. Space Allocation: Evaluate the available area in your backyard and determine where the bowling alley will fit best. Keep in mind that a regulation-size bowling lane is approximately 42 inches wide and 60 feet long. Adjust the dimensions according to the space you have.
2. Materials: Research the materials you’ll need, including wood for the lane, synthetic or wooden boards for the gutters, pins, and bowling balls. Opt for durable materials that can withstand outdoor elements.
3. Permits and Regulations: Check with your local authorities regarding necessary permits and regulations for constructing a recreational structure in your backyard. Adhering to local codes is crucial to avoid legal complications down the line.
4. Budget: Estimate the costs of materials, tools, and any professional assistance you might require. Create a budget that you’re comfortable with and try to stick to it as closely as possible.
Construction Phase: Rolling Up Your Sleeves
Once you have a solid plan in place, it’s time to roll up your sleeves and start constructing your backyard bowling alley. Here’s a step-by-step guide to help you through the process:
1. Clear the Area: Remove any obstacles, debris, or vegetation from the chosen area. Level the ground as much as possible to ensure a smooth playing surface.
2. Build the Foundation: Create a sturdy base for your bowling alley by laying down a foundation of gravel or crushed stone. This will provide proper drainage and prevent the alley from shifting over time.
3. Construct the Lane: Begin by building the lane itself. Use high-quality wood or synthetic materials for a smooth and even surface. Follow the dimensions carefully, ensuring the lane’s width and length are accurate.
4. Install Gutters: Attach gutters on either side of the lane to catch stray balls and guide them back to the player. These can be made from wood or synthetic materials and should be sloped slightly downward toward the player’s end.
5. Set Up the Pins: Place bowling pins at the end of the lane in a triangular formation. You can purchase official pins or create your own with wood. Ensure the pins are set up precisely according to regulation standards.
6. Add the Approach Area: Designate a section at the beginning of the lane as the approach area. This is where players will take their shots. Create a smooth and slip-resistant surface to prevent accidents.
7. Finishing Touches: Paint the lane and gutters with weather-resistant paint to protect the wood from the elements. Consider adding your personal touch by decorating the area around the alley with comfortable seating, lighting, and landscaping.
Maintenance and Enjoyment: Keeping the Fun Rolling
Congratulations, you’ve successfully built your own backyard bowling alley! However, the journey doesn’t end here. To ensure the longevity of your creation and the continuous enjoyment of all who play on it, consider the following maintenance tips:
1. Regular Cleaning: Keep the lane and gutters free from leaves, debris, and dirt. Regular sweeping and occasional power washing will help maintain a smooth playing surface.
2. Inspect for Wear and Tear: Periodically assess the condition of the lane, gutters, and pins. Replace any worn-out components to prevent accidents and maintain the quality of the bowling alley.
3. Weather Protection: If possible, invest in a cover or shelter for the bowling alley to protect it from rain, snow, and harsh sunlight. This will extend its lifespan and reduce the frequency of maintenance.
4. Organize Tournaments: Make the most of your backyard bowling alley by organizing friendly tournaments with family and friends. It’s a great way to create lasting memories and bring people together.
Conclusion
Embarking on the journey of building a DIY backyard bowling alley is not just about constructing a recreational space; it’s about embracing the satisfaction of creating something with your own hands. From the initial planning phase to the final roll of the ball, the process is a testament to your dedication and craftsmanship. As you watch your loved ones gather around, enjoying the fruits of your labor, you’ll realize that the effort you put into this project was truly a strike of genius. So, get your DIY skills rolling and let the strikes and spares begin in your very own backyard bowling haven.
