
 You open your closet doors Monday morning, and instead of a streamlined selection of outfits, you’re met with a fabric landslide. A shirt is wedged so tightly between two coats that it looks like it’s been through a vacuum sealer, and the rod itself is bowing ominously in the middle like a bridge under too much stress. If this sounds familiar, you aren’t just messy—you’re likely dealing with a failure in “closet physics.”
In my ten years of renovating homes and optimizing tight urban spaces, I’ve seen more collapsed closet rod setups than I care to count. Most people treat their closet rod as a simple “set it and forget it” utility. In reality, the closet rod is the structural spine of your entire storage ecosystem. When you master the rod system, you don’t just find a place for your clothes; you effectively double your usable square footage without moving a single wall.
The Hidden Mechanics of a High-Performance Closet Rod
When I walk into a client’s home, the first thing I check isn’t the color of the shelving; it’s the diameter and material of the closet rod. Think of your closet rod as the suspension bridge of your wardrobe. If the “cables” (brackets) and the “deck” (the rod itself) aren’t synced, the whole system is destined for a catastrophic failure.
Most builder-grade closets come with thin, hollow steel or—heaven forbid—flimsy wood rods that are too long for their own good. For a beginner, the most important technical data point to remember is the deflection rate. This is how much the rod bends under weight. A standard 1-inch steel rod will start to show visible stress at about 48 inches of length if it doesn’t have a center support.
To maximize capacity, you need to transition from “hanging space” to “zonal management.” This starts with selecting a heavy-duty chrome or stainless steel closet rod with a wall thickness of at least 2mm. This isn’t just for looks; it’s about ensuring that your winter coats don’t end up in a heap on the floor at 3 AM.
Strategic Height: The “Double Hang” Revolution
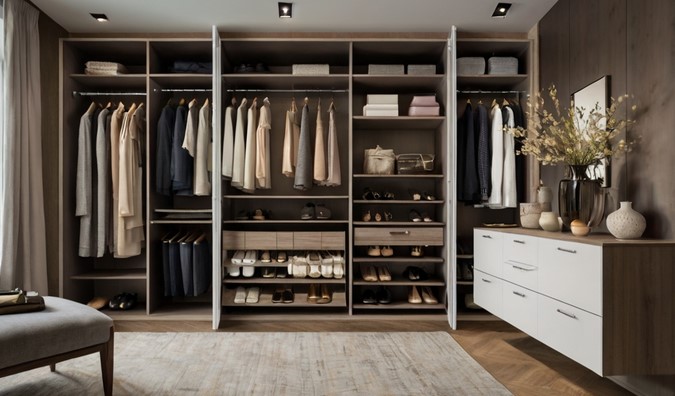
The biggest mistake I see intermediate DIYers make is mounting their closet rod at a single “standard” height. Usually, this is around 65 to 70 inches from the floor. This leaves a massive “dead zone” underneath where shoes pile up in a chaotic mountain.
If you want to maximize capacity, you must embrace the Double Hang System. Here is how we break it down:
-
Top Rod (High Zone): Mount this at approximately 80–84 inches. This is for out-of-season items or shorter pieces like folded trousers and shirts.
-
Bottom Rod (Active Zone): Mount this at 38–42 inches. This creates a second tier of storage for skirts, folded jeans, and tops.
By using this vertical stacking method, you are effectively taking a 5-foot wide closet and turning it into 10 feet of linear hanging space. It’s like building a skyscraper instead of a ranch-style house; when you can’t go wider, you must go higher.
Material Matters: Wood vs. Metal vs. Oval
Choosing the right closet rod material is where the data meets the aesthetic. In my experience, each material serves a specific “weight class” of clothing.
1. The Classic Round Steel Rod
This is the workhorse of the industry. I recommend a chrome-plated finish because it allows hangers to slide with minimal friction. If you’ve ever had to “tug” a hanger across a painted wooden rod, you know how frustrating that resistance can be.
2. The Professional Oval Rod
If you look inside high-end custom boutiques, you’ll notice they rarely use round rods. They use oval closet rods. Why? Because the vertical orientation of an oval rod offers much higher resistance to bending (deflection) than a round rod of the same weight. It also provides a slimmer profile, which looks incredibly sleek.
3. The Traditional Hardwood Rod
Wood is beautiful but temperamental. If you insist on wood, you must use a diameter of at least 1-3/8 inches and stick to hardwoods like Oak or Maple. Avoid Pine; it’s too soft and will sag faster than a cheap mattress under a heavy load.
The Pro’s Secret: Support and Anchoring
A closet rod is only as strong as the wall it’s attached to. I’ve seen DIYers use high-end brass rods only to secure them into 1/2-inch drywall with plastic anchors. This is a recipe for disaster.
The “Expert Advice” here is simple: Always find the studs. A standard shirt weighs about 0.5 lbs, but a heavy wool coat can weigh 5 lbs. Over a 4-foot span, that weight adds up quickly.
-
Stud Alignment: Use a stud finder to ensure your end brackets are screwed directly into the wooden framing behind the drywall.
-
The 3-Foot Rule: If your closet rod span exceeds 36 inches, you must install a center support bracket. This prevents the “smile” effect (the rod sagging in the middle), which eventually pulls the end brackets out of the wall.
Organizing for Capacity: The “Breathe” Technique
Once your hardware is locked in, how you utilize the closet rod determines your daily stress levels. I teach my clients the “One-Finger Rule.” You should be able to slide a single finger easily between every garment on the rod.
If your clothes are packed so tight you have to use force to find a shirt, you aren’t just disorganized—you’re damaging your clothes. Tight packing prevents airflow, which leads to wrinkles and, in some climates, a musty odor or even mildew.
Maximize space by categorizing by length:
-
Long Hang: One section for dresses and long coats.
-
Medium Hang: A section for trousers (hung by the cuff).
-
Short Hang: Two tiers for shirts and jackets.
By grouping by length, you clear up floor space under the “Short Hang” sections for modular drawers or shoe racks, creating a fully integrated system.
Pro Tip: The Hanger Factor
Never underestimate the power of the hanger. Throw away your mismatched plastic and wire hangers. Switch to slimline velvet hangers. They have a tiny footprint compared to bulky plastic ones, allowing you to fit up to 30% more clothing on the exact same closet rod. Plus, the friction keeps silky tops from sliding off into the “closet abyss.”
Common Pitfalls to Avoid
Even with the best closet rod, a few hidden dangers can ruin your project.
-
Over-Extending Telescoping Rods: Many hardware stores sell “adjustable” rods that slide out. These are convenient but inherently weak at the joint. If you use one, ensure the overlap is at least 6 inches, and always place a support bracket directly at the junction point.
-
Ignoring the “Return” Space: Don’t run your rod all the way into a deep corner where you can’t reach the clothes. Stop the rod 12 inches short of a deep corner and use that space for shelving or hooks for bags.
-
Incorrect Bracket Height: Ensure your brackets are perfectly level. A rod that is even 1/2 inch off-level will cause all your hangers to migrate toward the lower end, creating a bunched-up mess.
Conclusion: Take Back Your Space
Redesigning your storage with a strategic closet rod system isn’t just a home improvement project; it’s a lifestyle upgrade. When your clothes are visible, accessible, and properly supported, your mornings become faster and your wardrobe lasts longer.
Remember, the goal isn’t just to “fit more stuff.” The goal is to create a system where your items are treated with respect and your space works for you, rather than against you. Start by measuring your current span and checking for that dreaded “sag.”
Ready to transform your closet? Start by auditing your current rod—is it bowing? Is it too low? Let me know in the comments what your biggest closet struggle is, or share a photo of your DIY rod upgrade! I’d love to help you troubleshoot your specific space.