
Category: Healthy Home

Critical Emergency Egress: Ensuring Safety via the Escape Ladder Window

Source:https://encrypted-tbn0.gstatic.com

Imagine waking up at 3:00 AM to the shrill pierce of a smoke detector. You rush to your bedroom door, touch the handle, and it’s scorching hot. The hallway is already a wall of thick, toxic black smoke. Your only way out is the second-story window. In a moment of pure panic, would you know if that window can actually save your life, or is it a dead end?

According to the National Fire Protection Association (NFPA), a home fire occurs every 93 seconds. Yet, over my 10+ years of working on home renovations and structural safety, I’ve walked into countless upper-floor bedrooms where the window setup makes an emergency exit nearly impossible.

We invest thousands in smart alarms and fire extinguishers, but we routinely ignore the final, critical step of emergency egress. Let’s look at how transforming a standard opening into a certified escape ladder window can mean the difference between a close call and a tragedy.

The Realities of Emergency Egress (An Expert’s Eye)

During a routine bedroom remodel last year, a client told me they felt completely safe because they bought a portable, roll-up rope ladder on Amazon. They kept it tucked deep in the back of a master closet, buried under a mountain of winter coats.

I asked the homeowner to fetch it while I timed him. It took him nearly two full minutes just to dig it out, untangle the nylon straps, and bring it to the sill. In a real house fire, flashover—the point where a room instantly erupts in flames—can happen in less than three minutes.

A portable ladder is better than nothing, but a true escape ladder window strategy relies on instant, intuitive deployment. If you can’t access it, attach it, and climb down within 30 seconds in pitch-black darkness, your emergency system is broken.

Anatomy of a Code-Compliant Escape Ladder Window

To understand what makes a window safe for an emergency exit, we have to look at the International Residential Code (IRC) requirements for emergency escape and rescue openings (EERO). Think of these codes not as annoying red tape, but as the absolute minimum baseline for human survival.

An emergency window is like a life jacket: it has to be large enough for a fully equipped firefighter to climb in while you are trying to climb out.

Minimum Dimension Requirements

For a second- or third-story window to legally and practically qualify as an egress exit, it must meet the following strict structural thresholds:

  • Minimum Net Clear Opening: At least 5.7 square feet of completely unobstructed space when the window is fully opened.

  • Minimum Opening Height: 24 inches.

  • Minimum Opening Width: 20 inches.

  • Maximum Sill Height: No more than 44 inches from the finished floor. If your sill is higher, you legally need a permanently fixed step underneath it.

Window Style Matters

Not all windows are created equal when it comes to attaching an emergency ladder. Casement windows (which crank outward like a door) are fantastic because they offer the entire window frame as an open escape path.

Double-hung windows (which slide up and down) cut your available opening space exactly in half, meaning you need a much larger overall window frame to meet that 5.7 square foot requirement.

Choosing and Staging Your Escape Ladder

Once your window structure meets the physical dimension codes, you need to pair it with the correct ladder system. There are two primary schools of thought here: portable hook-on systems and permanently integrated built-in units.

Portable Hook-On Ladders

These are the most common and budget-friendly options. They feature rigid steel hooks designed to clamp over a standard interior windowsill.

If you use this style, it must be stored in an unlocked, clearly labeled container right beneath or adjacent to the specific escape ladder window. Never store it in a closet across the hall.

Built-In Drop-Down Ladders

If you are planning a comprehensive home improvement project, I highly recommend looking into permanently installed, built-in escape ladders. These units are recessed directly into the exterior wall framing beneath the window sill, hidden behind a clean interior panel.

In an emergency, you simply open the panel door and deploy the ladder outside. There is zero risk of the ladder slipping, shifting, or failing to hook securely onto the sill.

+---------------------------+---------------------------------+-----------------------------------+
| Feature                   | Portable Hook-On Ladder         | Permanently Built-In Ladder       |
+---------------------------+---------------------------------+-----------------------------------+
| Deployment Speed          | Moderate (Requires retrieval)   | Instant (Single-lever pull)       |
| Structural Stability      | Dependent on window sill depth  | Anchored directly to wall studs   |
| Visual Aesthetics         | Hidden in a storage box/bag     | Flush-mount wall panel            |
| Cost Factor               | Budget-friendly                 | Premium (Requires installation)   |
+---------------------------+---------------------------------+-----------------------------------+

Technical Safety Checklist for Homeowners

When upgrading your upper floors to include a reliable escape ladder window, you must verify the underlying structural elements. A premium safety device is completely useless if the window itself is stuck closed.

1. Verify Siding and Sill Integrity

Before trusting a hook-on ladder with your body weight, inspect the structural health of your window frame. Rotting wood, degraded PVC, or loose exterior trim can instantly crush or buckle under the sudden leverage of an adult stepping onto a ladder hook. Ensure the structural header and framing studs are completely solid.

2. Ditch the Painted-Shut Windows

In older homes, layers of historical oil-based paint can effectively glue a window sash to its frame. If you have to muscle, kick, or slam a window to break the paint seal, it is a structural hazard. Scrape away old paint buildup, replace broken counterweights, and lubricate the tracks so the window glides open with minimal effort.

3. Screen and Security Bar Quick-Releases

Insect screens must be easily pop-out style from the inside without requiring tools. If your home features metal security bars over the windows, they must have an internal, tool-free quick-release mechanism. If a child cannot open the security bars with a single push or pull during a drill, the room is a trap.

The Siding Trap

Many standard portable escape ladders are designed to rest directly against the flat exterior walls of your home. However, if your home features deep architectural trim, projecting window trim, or fragile vinyl siding, the stabilizing standoffs (the metal brackets that keep the rungs away from the wall) can slip or crack through the material. Always test-fit your ladder model against your specific exterior wall finish during a non-emergency weekend daylight check.

The 3-Step Emergency Drill You Need Tonight

As someone who builds things for a living, I can tell you that hardware is only 50% of the safety equation. The other half is human muscle memory. Knowing how to use your escape ladder window system must be practiced.

  • Step 1: The Blindfold Test. Sit on your bed, close your eyes, and simulate a zero-visibility smoke environment. Move from your bed to the window, open it, and locate your ladder storage container purely by touch.

  • Step 2: The Hook Verification. With your window fully open, lift the ladder and securely place the hooks over the frame. Ensure the standoffs rest flat against the exterior structure. (Do not fully drop the rungs to the ground if you want to avoid scratching your exterior siding during practice).

  • Step 3: The Weight Transition. Teach your family members the proper method for exiting: turn around so you are facing inside the bedroom, lower your legs over the sill first, and firmly plant your feet on the top rungs before letting go of the window frame.

Protecting Your Highest Assets

Home improvement is often about building beautiful, functional, and value-adding spaces. But the ultimate project you can ever take on is one that keeps your family safe when the unexpected strikes. Ensuring you have a code-compliant, easily operational escape ladder window in every upper-floor bedroom isn’t just a smart renovation checklist item—it’s a fundamental duty of home ownership.

Let’s Secure Your Home Together

Take a walk up to your second-floor bedrooms right now. Do your windows meet the minimum 5.7 square foot requirement? Can they open smoothly without sticking? If you have questions about framing alterations, specific window styles, or choosing the right ladder rating for your wall depth, let’s talk in the comments section below!

HVAC Performance Analysis: Monitoring Airflow Efficiency with the Anemometer Air Flow

Source:https://www.sussexdampexperts.com

Imagine sitting in your living room on a blistering 95°F afternoon. Your AC is humming, the vents are open, but you’re still sweating through your shirt. You walk over to the register, feel a weak, lukewarm breeze, and sigh. Most homeowners assume the “freon” is low or the compressor is dying, but in my ten years of crawling through attics and troubleshooting temperamental systems, I’ve found that the culprit is often invisible: poor airflow.

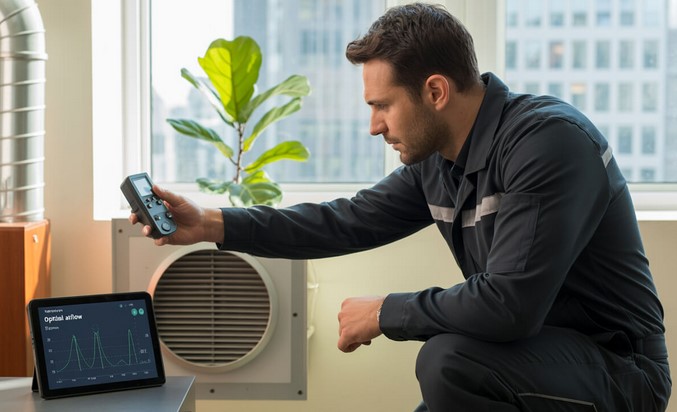
I once spent four hours at a client’s house who was convinced they needed a $10,000 system replacement. Their vents were blowing, but the house felt like a sauna. When I pulled out my anemometer air flow meter, the data told a different story. The air was moving at barely 200 Feet Per Minute (FPM) when it should have been hitting 500. The fix wasn’t a new unit; it was a crushed duct and a dirty coil. That $150 tool saved them thousands.

In this deep-dive, we’re going to look past the thermostat and get into the “lungs” of your home. We’ll explore how professional-grade monitoring can turn a sluggish HVAC into a high-performance machine.

Why Airflow is the Lifeblood of Your Home

To understand HVAC, you have to stop thinking about “cold air” and start thinking about energy transfer. Your HVAC system is basically a giant heat sponge. If air doesn’t move across the coils at the right speed, that sponge can’t soak up the heat from your rooms.

Think of your HVAC system like a marathon runner wearing a heavy mask. The runner has the muscles (the compressor) and the lungs (the blower motor), but if the mask (restricted airflow) prevents them from breathing properly, they will collapse long before the finish line.

When you use an anemometer air flow device, you are essentially checking the runner’s oxygen levels. Without enough air passing through the system, the evaporator coil gets too cold and freezes into a block of ice, or the furnace heat exchanger gets too hot and cracks. Both are “death sentences” for your equipment.

Mastering the Anemometer Air Flow Tool

For the uninitiated, an anemometer is a device used to measure wind speed and pressure. In the HVAC world, we specifically use digital vane or hot-wire anemometers to calculate CFM (Cubic Feet per Minute). This is the magic number that tells us if your system is actually doing its job.

Choosing the Right Tool for the Job

If you’re a DIY enthusiast or a junior tech, you’ll encounter two main types:

  • Vane Anemometers: These look like small fans. They are excellent for measuring airflow at large return grilles or supply registers. They are rugged and easy for beginners to read.

  • Hot-Wire Anemometers: These use a tiny, heated wire to detect air movement. They are incredibly sensitive and perfect for reaching inside ductwork through a small “static pressure” hole to see what’s happening deep in the system.

How to Take an Accurate Reading

Measuring anemometer air flow isn’t as simple as holding it up to a vent for a second. Airflow is turbulent. To get a real reading, you need to perform a “traverse.” This involves moving the sensor across the entire opening of the vent in a grid pattern to get an average speed.

If you just measure the center, you might get a “hot spot” of high velocity that doesn’t represent the actual volume of air entering the room. Precision is the difference between a guess and a diagnosis.

Calculating CFM: The Math Behind the Comfort

Once you have your velocity reading in FPM (Feet Per Minute) from your anemometer air flow meter, you need to convert it to CFM. This is where the technical side meets practical application.

The formula is simple:

$$CFM = Velocity (FPM) \times Area (Square Feet)$$

If you have a vent that is 1 foot by 1 foot (1 sq. ft) and your anemometer reads 400 FPM, you are moving 400 CFM. Most residential systems require roughly 400 CFM per ton of cooling. If you have a 3-ton unit, you need to see a total of 1,200 CFM moving through your ductwork.

When I find a 3-ton system only pushing 800 CFM, I know immediately that the blower speed needs adjustment, the ductwork is undersized, or the filter is way too restrictive.

Common Airflow Killers Found via Monitoring

In my experience, the anemometer air flow readings don’t lie, even when the homeowner thinks everything is fine. Here are the most common “invisible” issues I find:

1. The “High-Efficiency” Filter Trap

We all want clean air, but those ultra-thick MERV 13 filters can be like breathing through a thick wool blanket. I’ve seen brand-new systems struggle because the filter was so dense the blower couldn’t pull air through it. Always check your FPM before and after a filter change.

2. Leaky Ductwork

If your anemometer air flow reading is 1000 CFM at the furnace but only totals 600 CFM when you add up all the room registers, you have a massive leak. You’re essentially paying to air condition your attic or crawlspace.

3. Crushed Flex Ducts

Flex duct is convenient, but it’s fragile. I’ve seen ducts crushed by boxes in the attic or kinked during installation. A visual inspection might miss it, but a drop in FPM at the register is a “smoking gun.”

Tips Pro: The Hidden Warning

High air velocity doesn’t always mean a healthy system. If your vents are “whistling” or loud, your velocity might be too high because your ducts are too small. This creates High Static Pressure, which wears out blower motors prematurely. Aim for a “quiet” velocity—usually between 500 and 700 FPM at the register for optimal comfort and equipment longevity.

DIY vs. Professional Monitoring

Can a beginner use an anemometer air flow meter? Absolutely. In fact, I encourage it. If you’re a homeowner, buying a basic vane anemometer can help you balance your own home.

How to balance your home:

  1. Take readings at every vent.

  2. Identify “weak” rooms (low FPM).

  3. Slightly close dampers in rooms with “excessive” FPM to force more air toward the weak rooms.

  4. Re-measure to ensure you haven’t choked the overall system airflow.

However, if you find that your total CFM is significantly lower than your unit’s rating, it’s time to call a pro. Issues like a fouled evaporator coil or a failing capacitor in the blower motor require specialized tools and safety knowledge that go beyond a simple handheld meter.

The Long-Term Benefits of Airflow Analysis

Monitoring your system isn’t just about comfort; it’s about the checkbook. A system with optimized anemometer air flow performance:

  • Reduces Energy Bills: Your unit runs shorter cycles to reach the target temperature.

  • Extends Equipment Life: Components don’t overheat or freeze, reducing wear and tear.

  • Improves Air Quality: Proper circulation ensures your air is actually passing through the filtration system as intended.

Your HVAC system is the most expensive appliance in your home. Treating it like a “black box” that you only touch when it breaks is a recipe for high bills and early replacements. By understanding the basics of airflow and using an anemometer air flow tool, you take control of your environment.

Next time your house feels “stuffy,” don’t just turn down the thermostat. Grab a meter, check your vents, and see if your system is actually breathing.

Have you ever checked the airflow in your home? Maybe you have a room that is always five degrees warmer than the rest? Drop a comment below or ask a question about your specific duct setup—I’d love to help you get your system running at peak efficiency!