
Source:https://m.media-amazon.com
Imagine you’re standing in the middle of a commercial renovation project. The clock is ticking, the client is checking their watch, and you have 200 linear feet of metal stud track to install before the sun goes down. You reach for your drill to drive a self-tapping screw into the header, but the screw “walks,” the metal stud slides three inches to the left, and now your layout is ruined. Worse yet, you look down and realize you’ve spent half your morning fumbling with a box of screws that seem to disappear into the subfloor.
In my decade of swinging hammers and managing job sites, I’ve learned that the loudest tool isn’t always the most effective. Many beginners think that high-performance framing requires more power tools and more fasteners. In reality, the pros rely on a silent, manual hero: the drywall stud crimp. When I first transitioned from residential wood framing to light-gauge steel, I wasted hours chasing screws. Once a mentor handed me a stud crimper, my productivity tripled. It wasn’t just about speed; it was about the structural “lock” that only a crimp can provide.
The Physics of the Crimp: Why Friction Beats Fasteners
To understand the value of the drywall stud crimp, we have to look at the physics of light-gauge steel. Unlike wood, which expands and grips a nail, steel is unforgiving. A screw creates a hole that can eventually wallow out if the building shifts. A crimp, however, works on the principle of mechanical deformation.
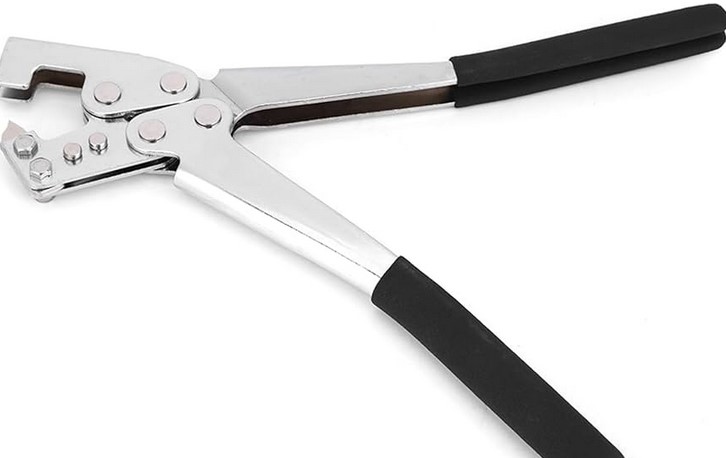
Think of a drywall stud crimper like a heavy-duty stapler that uses the metal itself as the staple. Instead of adding a third material (a screw) to join two pieces of galvanized steel, the tool punches through both layers and folds the metal over on itself. This creates a high-friction bond that holds the stud perfectly plumb while you prepare for the drywall installation.
For the beginner, this means no more “screw head bumps” under your gypsum board. For the intermediate pro, it means a significant reduction in material costs and a much cleaner finish.
Mastering the Drywall Stud Crimp Technique
Using a drywall stud crimp tool isn’t just about squeezing hard; it’s about leverage and positioning. In my experience, the “one-handed” squeeze is a myth for anyone doing more than ten studs. To maintain precision, you need to master the stance.
1. Setting the Track
Before you even touch the crimper, your top and bottom tracks (the “runners”) must be perfectly aligned with a laser level. Light-gauge steel is flexible, so if your track is off by 1/16 of an inch, the crimp will lock that error into the wall.
2. The Bite and Fold
Position the jaws of the drywall stud crimp tool over the flange of the stud and the lip of the track simultaneously. When you engage the handles, the tool’s hardened steel punch pierces the metal. As you complete the squeeze, it creates a rectangular or “V” shaped fold.
3. Squaring the Stud
The beauty of the crimp is that it allows for a “micro-adjustment” before you apply full pressure. I always tell my crew to “seat the stud” first—give it a light tap to ensure it’s flush against the back of the track—before committing to the crimp.
Technical Data: Strength vs. Speed
Let’s get into the numbers. A standard drywall stud crimp is designed for non-load-bearing partitions using 20 to 25-gauge steel.
-
Gauge Capacity: Most professional crimpers are rated for up to 22-gauge steel. If you try to crimp 16-gauge structural steel, you’ll break the tool’s pivot pin.
-
Shear Strength: While a crimp provides excellent lateral stability during construction, it is not a replacement for structural screws in load-bearing walls.
-
Time Savings: On average, using a crimper is 40% faster than using a screw gun for track-to-stud connections. Over a large commercial floor, that equates to days of saved labor.
The Hidden Benefits for the Finishers
As someone who has also spent plenty of time finishing drywall, I have a personal vendetta against poorly driven screws. When you use a screw to join a stud to a track, the head of the screw creates a small “pimple” on the surface of the metal.
When the drywallers come in and slap a sheet of 5/8-inch Type X board against that screw head, the board doesn’t sit flat. This leads to:
-
Cracked board edges.
-
Popped screws later in the project’s life.
-
Extra mudding work to hide the uneven surface.
By using a drywall stud crimp, you leave the face of the stud perfectly flush. The drywall sits tight against the metal, resulting in a wall that looks like a sheet of glass once the paint hits it.
Tips Pro: The “Quiet” Advantage
If you are working on a renovation in an occupied office building or a hospital, noise is your enemy. A screw gun at 4,000 RPM is loud and disruptive. The drywall stud crimp is virtually silent. I’ve completed entire wing partitions in active clinics without a single noise complaint simply by switching to crimping.
Choosing the Right Tool: Vane vs. Compound Leverage
Not all crimpers are created equal. When you’re looking to invest in a drywall stud crimp tool, you’ll see two main varieties:
-
Direct-Action Crimpers: These are simpler and cheaper but require significant hand strength. Best for small DIY closet projects.
-
Compound Leverage Crimpers: These use a double-pivot system to multiply your hand force. If you are doing a whole basement or a commercial space, do not buy anything else. Your forearms will thank you.
Look for a tool with ergonomic rubber grips. Steel studs are often coated in a light oil (to prevent rust), and if your hands are sweaty, a metal-handled tool becomes a slippery nightmare.
Common Pitfalls and How to Avoid Them
Even with a decade of experience, mistakes happen. The most common issue with a drywall stud crimp is “ghosting.” This happens when the punch pierces the metal but fails to fold it over correctly.
-
Worn Punches: If your crimp looks like a simple hole rather than a fold, your punch is dull. Most pro-grade tools have replaceable bits. Don’t wait until the stud falls over to change it.
-
Over-Crimping: Squeezing too hard on very thin 25-gauge metal can actually tear the flange, making the connection weaker than if you hadn’t crimped it at all. Learn the “click” of your tool and stop there.
The drywall stud crimp is more than just a tool; it’s a commitment to a cleaner, faster, and more professional workflow. It bridges the gap between a “good enough” DIY job and a commercial-grade structural partition. By removing the need for thousands of fasteners, you reduce waste, save your ears from the drone of a drill, and ensure your drywall finishers aren’t cursing your name during the taping phase.
If you’re still relying purely on screws for your light-gauge framing, it’s time to evolve your kit.
Have you ever tried a stud crimper, or are you a die-hard screw fan? I’d love to hear your thoughts on the “feel” of a crimped wall versus a screwed one. Drop a comment below or ask a technical question about your next framing project—I’m here to help you build it right the first time!
Would you like me to recommend a specific brand of compound-leverage crimpers or explain how to handle structural 16-gauge framing?