Category: Painting & Drywall

Precision Edge Protection: Ensuring Professional Finishes with Painter Tape Green

Source:https://d8jasjg5l4wyj.cloudfront.net

You peel back the tape, expecting a razor-sharp, flawless line that looks like it was done by a high-end contractor. Instead, your heart sinks. The paint has bled underneath, leaving a jagged, messy edge that looks like a watercolor accident. Worse yet, chunks of your expensive baseboard primer are coming off attached to the adhesive.

In my 10+ years of working on residential jobsites, I have seen this exact heartbreak play out hundreds of times with DIYers and intermediate painters alike.

[The Jagged Edge] ---> What happens with cheap or improperly applied tape.
[The Razor Finish] ---> What happens when you master Painter Tape Green.

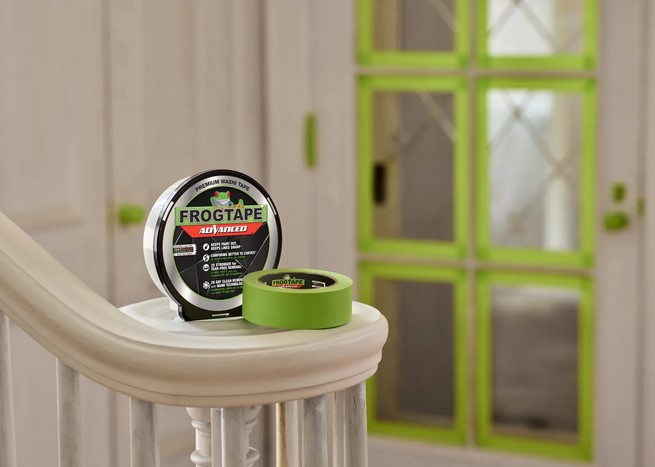
The difference between a botched DIY look and a sleek, crisp finish usually comes down to a single roll of painter tape green. Over the years, I have tested almost every masking adhesive on the market, from basic utility masking tape to specialized fragile-surface rolls.

Green painter’s tape remains the undisputed workhorse of the industry—if you know how to wield it. Let’s look past the marketing fluff and dive into the actual science and practical techniques required to get professional edge protection every single time.

The Anatomy of Painter Tape Green: Why Color and Chemistry Matter

To beginners, tape is just tape. But using standard cream-colored masking tape on a wall is like trying to do surgery with a butter knife. It’s the wrong tool for the job.

The Problem with Standard Masking Tape

Standard masking tape utilizes a high-tack rubber adhesive. It is designed to hold heavy boxes together, not to release cleanly from delicate drywall or cured latex paint. Leave it on for more than a few hours, and its adhesive bonds permanently, guaranteeing a ruined surface upon removal.

The Green Innovation: Medium Adhesion and UV Resistance

Painter tape green is specifically engineered with a modified acrylic adhesive system. This chemistry provides a medium-level tack that offers a crucial balance: enough grip to seal out liquid paint, but enough flexibility to release cleanly without leaving sticky residue behind.

  • Crepe Paper Backing: The textured paper backing allows the tape to stretch slightly, which is essential when you are trying to mask subtle curves or uneven surfaces like textured plaster.

  • UV and Sunlight Stability: Most high-quality green tapes can withstand direct sunlight for up to 8 or 14 days without baking into the trim. This gives you a massive window to finish multi-day projects.

Application Mechanics: How to Prep and Lay the Line

Applying tape correctly is a physical skill, much like laying a clean bead of caulk. If you pull it off the roll haphazardly, it will stretch, warp, and fail.

Surface Preparation: The Unsung Hero

No tape will stick to a wall coated in drywall dust or greasy fingerprints. Before unrolling a single inch, wipe down your baseboards, casings, and trim with a damp microfiber cloth and a mild soap solution. Allow the surface to dry completely for at least 30 minutes.

The “Pull and Press” Technique

Never pull a long, five-foot strip of tape and try to slap it onto the wall all at once; it will twist and go off-course. Instead, follow this step-by-step approach:

1.Unroll short sections:Working in 12-inch increments.

Pull out about 12 inches of tape from the roll, keeping the roll flush against the surface you are protecting.

2.Anchor and align:Do not stretch the paper.

Anchor the tape down gently at the starting point, then press it along the edge. Ensure you do not pull or stretch the tape, as stretched tape will slowly snap back and lift away from the corner.

3.Burnish the edges:The most critical step.

Run a clean plastic putty knife or the back of your fingernail firmly along the active edge of the tape. This friction activates the acrylic adhesive and seals any microscopic gaps in the paper texture.


Preventing Paint Bleed: The “Pre-Sealing” Analogy

Think of paint bleed like water trying to slip under a closed door. Even if you burnish the tape perfectly, textured walls or heavy wood grain possess tiny valleys that the adhesive cannot completely fill. Liquid paint will find those valleys through capillary action.

To prevent this, we use a trick called pre-sealing.

Imagine filling the gap under that door with clear silicone before a flood arrives. By applying a microscopic layer of the existing wall color or a paintable clear caulk directly over the tape’s edge before you apply your main color, you force the tape to bleed on purpose with a harmless fluid.

Once that seal dries, your topcoat cannot penetrate underneath. When you pull the tape away, the result is an incredibly crisp, professional line.

The Curing Trap

Never apply painter tape green to fresh paint that feels dry but hasn’t fully cured. Dry to the touch usually takes 2 to 4 hours, but latex paint requires 7 to 14 days to fully cure and harden. Taping too early will pull the fresh paint film right off the wall like a sheet of plastic.

The Art of the Pull: Timing and Angles

The job isn’t finished until the tape is successfully off the wall. Most DIYers leave the tape on until the entire project is completely dry, which is actually a major mistake.

Factor Wet Pull Method (Recommended) Fully Dry Pull Method
Timing Pull when paint is tacky, before final skin forms. Pull 24+ hours after application.
Edge Quality Soft paint separates easily, leaving sharp lines. Dry paint creates a unified film that tears easily.
Residue Risk Minimal. High if left past the tape’s rated window.

The 45-Degree Rule

When removing your painter tape green, never pull it straight out at a 90-degree angle relative to the wall. Instead, fold the tape back on itself and pull at a steady, slow 45-degree angle.

This geometric angle uses the tape’s own backing as a cutting mechanism to cleanly slice through the drying paint film, preventing jagged tears.

   [Wall Surface]
         |
         | \  <--- Pull backward at a 45-degree angle
         |  \
         |   [Tape being removed]

If you notice the dry paint film starting to bridge and tear away from the wall during removal, stop immediately. Run a sharp utility knife lightly along the edge of the tape to score the paint film before continuing your pull.

Conclusion: Elevate Your Painting Game

Achieving a flawless, contractor-grade finish isn’t about natural talent or expensive spray rigs; it’s about mastering the physics of edge protection. By matching your project with a reliable roll of painter tape green, prepping your surfaces meticulously, and utilizing the 45-degree removal rule, you eliminate the guesswork from painting.

What project are you tackling next? Are you dealing with tricky textured walls or trying to get sharp lines on old baseboards? Leave a comment below with your biggest painting frustrations, and let’s troubleshoot your technique together!

Precision Structural Framing: Enhancing Productivity with the Drywall Stud Crimp

Source:https://m.media-amazon.com

Imagine you’re standing in the middle of a commercial renovation project. The clock is ticking, the client is checking their watch, and you have 200 linear feet of metal stud track to install before the sun goes down. You reach for your drill to drive a self-tapping screw into the header, but the screw “walks,” the metal stud slides three inches to the left, and now your layout is ruined. Worse yet, you look down and realize you’ve spent half your morning fumbling with a box of screws that seem to disappear into the subfloor.

In my decade of swinging hammers and managing job sites, I’ve learned that the loudest tool isn’t always the most effective. Many beginners think that high-performance framing requires more power tools and more fasteners. In reality, the pros rely on a silent, manual hero: the drywall stud crimp. When I first transitioned from residential wood framing to light-gauge steel, I wasted hours chasing screws. Once a mentor handed me a stud crimper, my productivity tripled. It wasn’t just about speed; it was about the structural “lock” that only a crimp can provide.

The Physics of the Crimp: Why Friction Beats Fasteners

To understand the value of the drywall stud crimp, we have to look at the physics of light-gauge steel. Unlike wood, which expands and grips a nail, steel is unforgiving. A screw creates a hole that can eventually wallow out if the building shifts. A crimp, however, works on the principle of mechanical deformation.

Think of a drywall stud crimper like a heavy-duty stapler that uses the metal itself as the staple. Instead of adding a third material (a screw) to join two pieces of galvanized steel, the tool punches through both layers and folds the metal over on itself. This creates a high-friction bond that holds the stud perfectly plumb while you prepare for the drywall installation.

For the beginner, this means no more “screw head bumps” under your gypsum board. For the intermediate pro, it means a significant reduction in material costs and a much cleaner finish.

Mastering the Drywall Stud Crimp Technique

Using a drywall stud crimp tool isn’t just about squeezing hard; it’s about leverage and positioning. In my experience, the “one-handed” squeeze is a myth for anyone doing more than ten studs. To maintain precision, you need to master the stance.

1. Setting the Track

Before you even touch the crimper, your top and bottom tracks (the “runners”) must be perfectly aligned with a laser level. Light-gauge steel is flexible, so if your track is off by 1/16 of an inch, the crimp will lock that error into the wall.

2. The Bite and Fold

Position the jaws of the drywall stud crimp tool over the flange of the stud and the lip of the track simultaneously. When you engage the handles, the tool’s hardened steel punch pierces the metal. As you complete the squeeze, it creates a rectangular or “V” shaped fold.

3. Squaring the Stud

The beauty of the crimp is that it allows for a “micro-adjustment” before you apply full pressure. I always tell my crew to “seat the stud” first—give it a light tap to ensure it’s flush against the back of the track—before committing to the crimp.

Technical Data: Strength vs. Speed

Let’s get into the numbers. A standard drywall stud crimp is designed for non-load-bearing partitions using 20 to 25-gauge steel.

  • Gauge Capacity: Most professional crimpers are rated for up to 22-gauge steel. If you try to crimp 16-gauge structural steel, you’ll break the tool’s pivot pin.

  • Shear Strength: While a crimp provides excellent lateral stability during construction, it is not a replacement for structural screws in load-bearing walls.

  • Time Savings: On average, using a crimper is 40% faster than using a screw gun for track-to-stud connections. Over a large commercial floor, that equates to days of saved labor.

The Hidden Benefits for the Finishers

As someone who has also spent plenty of time finishing drywall, I have a personal vendetta against poorly driven screws. When you use a screw to join a stud to a track, the head of the screw creates a small “pimple” on the surface of the metal.

When the drywallers come in and slap a sheet of 5/8-inch Type X board against that screw head, the board doesn’t sit flat. This leads to:

  • Cracked board edges.

  • Popped screws later in the project’s life.

  • Extra mudding work to hide the uneven surface.

By using a drywall stud crimp, you leave the face of the stud perfectly flush. The drywall sits tight against the metal, resulting in a wall that looks like a sheet of glass once the paint hits it.

Tips Pro: The “Quiet” Advantage

If you are working on a renovation in an occupied office building or a hospital, noise is your enemy. A screw gun at 4,000 RPM is loud and disruptive. The drywall stud crimp is virtually silent. I’ve completed entire wing partitions in active clinics without a single noise complaint simply by switching to crimping.

Choosing the Right Tool: Vane vs. Compound Leverage

Not all crimpers are created equal. When you’re looking to invest in a drywall stud crimp tool, you’ll see two main varieties:

  1. Direct-Action Crimpers: These are simpler and cheaper but require significant hand strength. Best for small DIY closet projects.

  2. Compound Leverage Crimpers: These use a double-pivot system to multiply your hand force. If you are doing a whole basement or a commercial space, do not buy anything else. Your forearms will thank you.

Look for a tool with ergonomic rubber grips. Steel studs are often coated in a light oil (to prevent rust), and if your hands are sweaty, a metal-handled tool becomes a slippery nightmare.

Common Pitfalls and How to Avoid Them

Even with a decade of experience, mistakes happen. The most common issue with a drywall stud crimp is “ghosting.” This happens when the punch pierces the metal but fails to fold it over correctly.

  • Worn Punches: If your crimp looks like a simple hole rather than a fold, your punch is dull. Most pro-grade tools have replaceable bits. Don’t wait until the stud falls over to change it.

  • Over-Crimping: Squeezing too hard on very thin 25-gauge metal can actually tear the flange, making the connection weaker than if you hadn’t crimped it at all. Learn the “click” of your tool and stop there.

The drywall stud crimp is more than just a tool; it’s a commitment to a cleaner, faster, and more professional workflow. It bridges the gap between a “good enough” DIY job and a commercial-grade structural partition. By removing the need for thousands of fasteners, you reduce waste, save your ears from the drone of a drill, and ensure your drywall finishers aren’t cursing your name during the taping phase.

If you’re still relying purely on screws for your light-gauge framing, it’s time to evolve your kit.

Have you ever tried a stud crimper, or are you a die-hard screw fan? I’d love to hear your thoughts on the “feel” of a crimped wall versus a screwed one. Drop a comment below or ask a technical question about your next framing project—I’m here to help you build it right the first time!

Would you like me to recommend a specific brand of compound-leverage crimpers or explain how to handle structural 16-gauge framing?