
Category: Maintenance & Repair

Precision Surface Restoration: Achieving Seamless Repairs with the Wood Filler Tube

Source:https://easiklip.com

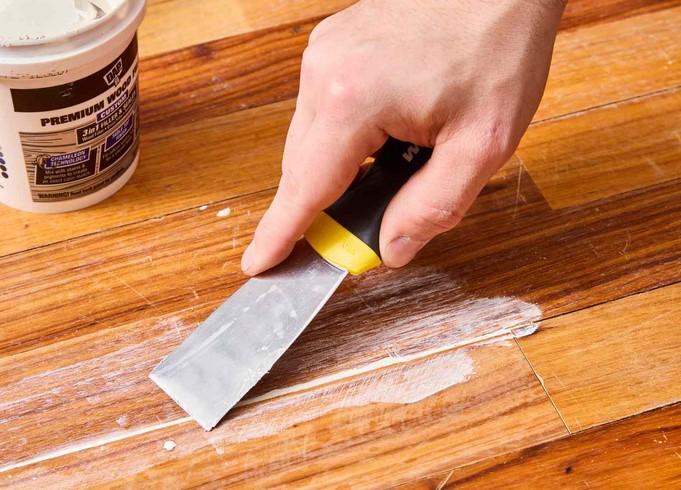
You are down to the absolute final stretch of a gorgeous restoration project. The old, scratched mahogany coffee table has been stripped, sanded, and prepped. Then, you spot it: a deep, ugly gouge right in the center of the tabletop where a rogue screw dug into the wood grain. If you ignore it, your final stain coat will pool inside the crater, turning it into an permanent, dark eyesore.

In my 10+ years of getting my hands dirty in the home improvement industry, I have seen this exact scenario freeze DIYers and intermediate woodworkers right in their tracks.

Many people assume that fixing deep blemishes requires complex, two-part epoxy compounds and professional-grade chemical masks. But for the vast majority of everyday home gouges, nail holes, and grain splits, the secret weapon in my toolbox is a reliable wood filler tube.

When deployed with the right technique, this humble squeeze tube can render structural blemishes completely invisible to the naked eye. Let’s pull back the curtain on the actual science and practical mechanics behind flawless surface restoration.

The Chemistry Behind the Compound: Solvent vs. Water-Based Fillers

Before squeezing any product onto your hard-earned wood surfaces, you must understand exactly what is inside that packaging. Not all compounds are created equal, and grabbing the wrong formula can completely ruin your finishing coat.

1. Water-Based Formulations (The Clean Finish)

Water-based compounds typically utilize wood flour, binders, and pigments suspended in water. They are the go-to choice for indoor furniture, baseboards, and cabinetry because they have almost zero odor and clean up seamlessly with a damp microfiber cloth.

  • Pros: Easy to sand, accepts stains beautifully, and can be thinned down with a few drops of warm water if it starts to dry out.

  • Cons: Not suitable for heavy outdoor exposure unless completely sealed with a high-grade polyurethane topcoat.

2. Solvent-Based Formulations (The Heavy Lifters)

Solvent-based fillers rely on wood fibers mixed with acetone or other chemical solvents. They smell strong, dry exceptionally fast, and cure to a rock-hard consistency that shrugs off weather and moisture.

  • Pros: Highly resistant to rot and water; perfect for exterior window sills, deck boards, and structural trim.

  • Cons: Requires mineral spirits or acetone for cleanup, and they can easily strip pre-existing finishes if smeared carelessly.

Why the Wood Filler Tube Wins for Precision Execution

For years, manufacturers sold filler almost exclusively in wide-mouth plastic tubs. If you are a pro filling hundreds of open grain pores across an entire dining table, a tub makes sense. But for target repairs, the tub format is an efficiency killer.

The moment you open a plastic tub, a massive volume of air rushes inside. Within weeks, the top layer forms a hard, unusable crust, forcing you to waste half the product.

An enclosed wood filler tube, however, acts like an airtight vault. It keeps the volatile elements of the compound perfectly preserved. The narrow nozzle allows you to inject the material directly into the base of a deep nail hole or split wood grain without smearing excess product over the surrounding pristine timber.

Think of it like using a syringe for medical precision versus using a trowel to slap mortar onto a brick wall.

The Step-by-Step Anatomy of a Flawless Surface Repair

Achieving a seamless repair requires a precise sequence. If you skip a step, the filler will eventually pull away from the wood walls, leaving a loose plug that pops out during temperature shifts.


đź’ˇ Pro Tip: The Sawdust Blend Trick

If you are working on a piece of raw timber that you plan to coat with a clear stain, collect a small pile of the fine sawdust generated during your prep sanding. Mix a few pinches of that exact dust directly into your water-based filler before squeezing it onto the spot. This infuses the repair patch with the authentic cell structure and color profile of the host timber, drastically improving stain uniformity.

Steering Clear of the “Shine Patch” Disaster

Even experienced woodworkers can stumble during the final clear-coating phase. Here are the two hidden warnings that keep me up at night on high-stakes restoration jobs.

  • The Non-Stainable Lie: Many product labels proudly declare they are “100% stainable.” The technical reality is that wood filler absorbs stain at a completely different rate than organic wood cells. It lacks natural grain pathways, meaning it can easily look lighter or darker than the rest of the surface. Always test your wood filler tube and stain combination on an inconspicuous test scrap before committing to the main face of your project.

  • The Flash Cracking Hazard: If you try to fill a hole deeper than 1/4 inch in a single pass, the outer shell will dry faster than the core. The trapped moisture below will try to escape, causing the surface to blister, crack, and break away. For deep voids, apply the compound in thin, sequential layers, allowing each layer to cure completely before injecting the next.

Conclusion: Master Your Finishing Details

At the end of the day, high-impact home improvement isn’t about avoiding mistakes—it’s about knowing how to fix them with absolute precision. By selecting the correct chemical formulation, utilizing the airtight delivery of a wood filler tube, and sanding with the grain, you can transform an accidental blunder into a totally invisible triumph.

Your furniture and woodwork deserve to look flawless, from the broad grain down to the smallest nail hole.

What kind of surface damage are you trying to repair right now? Are you working on a stained antique or painting over rough exterior trim? Leave a comment below with your project details, and let’s get your woodwork looking seamless together!

Mechanical Performance Tuning: Optimizing Stability via Ceiling Fan Balance

Source:https://cdn.hibuwebsites.com

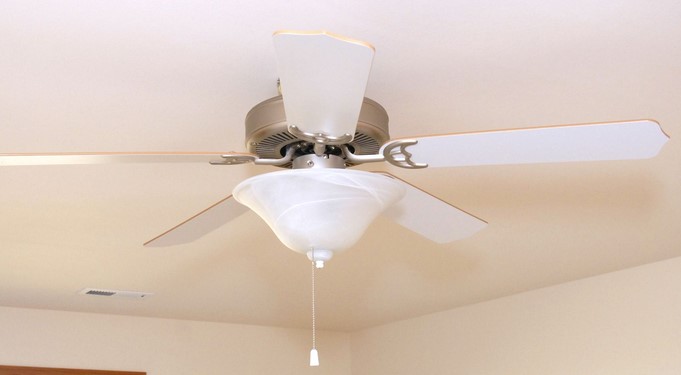
It starts as a faint rhythmic thump-thump-thump. You try to ignore it, but as you click the wall switch to “High,” your ceiling fan begins to oscillate so violently it looks like it’s preparing for liftoff. In my decade of troubleshooting high-end residential interiors, I’ve seen homeowners literally move furniture out from under a wobbling fan, fearing it might fall.

The truth is, a fan rarely falls, but that “wobble” is a mechanical cry for help. It’s grinding down the motor bearings, loosening the mounting bracket, and wasting energy. Achieving a perfect ceiling fan balance isn’t just about silence; it’s about preserving the lifecycle of your hardware and ensuring your home remains a sanctuary rather than a construction zone.


The Physics of the Wobble: Why Fans Lose Their Center

In my early years as a contractor, I assumed a wobble meant a cheap fan. I was wrong. I’ve seen $1,000 designer fans shake just as much as a $50 box-store special. A ceiling fan is essentially a high-torque centrifugal machine. If one blade is just a few grams heavier than the others, or if it sits at a slightly different angle, the entire center of gravity shifts.

Think of it like a car tire. If the tire is out of balance by even half an ounce, your steering wheel vibrates at high speeds. Your ceiling fan is the same. The “wobble” is the physical manifestation of asymmetric centrifugal force.

The Three Usual Suspects

Before we dive into the technical tuning, we have to identify the source. In 90% of my service calls, the issue stems from:

  1. Accumulated Debris: A thick layer of dust on one blade acts like a lead weight.

  2. Hardware Fatigue: Screws at the blade iron (the arm holding the blade) often loosen due to constant vibration.

  3. Warping: In humid environments, wooden blades can absorb moisture unevenly, changing their weight and aerodynamic “lift.”


Step 1: The “Deep Clean” and Tighten Protocol

Before you spend a dime on a balancing kit, you must perform what I call the “Maintenance Baseline.” I once spent an hour trying to balance a fan in a coastal kitchen, only to realize that a buildup of grease and kitchen grime on the leading edge of one blade was the culprit.

  • Clean the Blades: Use a microfiber cloth and a mild degreaser. Clean the top, bottom, and edges.

  • The Hardware Audit: Take a screwdriver and manually check every screw connecting the blades to the blade irons, and the irons to the motor housing.

  • The Hanger Ball Check: Ensure the “ball” at the top of the downrod is seated firmly in the groove of the mounting bracket. If it’s shifted, no amount of weight will fix the shake.


Step 2: Precision Measuring (The Yardstick Test)

This is a trick I learned from a veteran electrician. You don’t need fancy sensors to find a tracking error.

  1. Pick a fixed point on the ceiling.

  2. Hold a yardstick vertically against that point so the end of the stick just touches the edge of a fan blade.

  3. Manually rotate the fan, checking the height of every blade against that same point.

If one blade is even 1/8th of an inch higher or lower than the others, your fan is “out of track.” This usually means a blade iron is bent. I usually fix this by applying very gentle pressure to the bracket to align it with the others—but be careful; cast zinc brackets can snap if you’re too aggressive.


Step 3: Using a Ceiling Fan Balance Kit

If your fan is clean, tight, and tracking straight but still wobbling, it’s time for ceiling fan balance tuning using a weight kit. These kits usually consist of a plastic U-shaped clip and several adhesive lead or steel weights.

The Trial-and-Error Method

  • The Clip Test: Turn the fan on and note the severity of the wobble. Turn it off. Attach the plastic clip to the trailing edge of any blade, halfway down its length.

  • The Rotation: Turn the fan back on. Did the wobble get better or worse? Repeat this process for every blade until you find the one where the clip reduces the wobble the most.

  • The Slide: Once you’ve found the “problem” blade, slide the clip up and down the length of that blade. There will be a “sweet spot” where the vibration almost disappears.

Permanent Weight Placement

Once the clip has stabilized the fan, peel the backing off an adhesive weight. Stick it on the top center of the blade, directly in line with where the clip was located. Remove the plastic clip and test again. You might need to add a second weight depending on the motor’s RPM.


Pro Advice: Advanced Tuning Insights

Tips Pro: The “Shadow” Trick

If you’re struggling to see the wobble clearly, turn on the fan and shine a bright flashlight or a work light across the ceiling. The shadow cast by the blades will amplify the movement, making it much easier to see if the fan is oscillating or simply vibrating.

The Electrical Box

If you balance the blades perfectly and the fan still has a slight sway, check the junction box in the ceiling. Many DIYers install fans on standard plastic “light fixture” boxes. A ceiling fan must be mounted to a fan-rated metal box braced to the joists. A standard box can fail over time, which is a significant safety hazard.


The Benefits of a Balanced System

When you achieve perfect ceiling fan balance, you aren’t just getting rid of an annoying sound. You are:

  • Reducing Amperage Draw: A balanced fan moves air more efficiently, putting less strain on the capacitor and motor windings.

  • Silencing the “Canopy Click”: That annoying clicking sound is usually the housing rubbing against the mounting bracket due to the wobble.

  • Enhancing Airflow: A stable fan maintains a consistent “cone” of air, which improves the cooling effect (wind chill factor) in the room.


Maintenance for the Long Haul

I recommend checking your fan’s balance once a year, preferably in the spring before heavy use begins. Screws naturally loosen over a season of rotation. If you live in a high-humidity area, be especially vigilant with MDF or wood-veneer blades, as they are most prone to “wilting” or losing their aerodynamic profile.

Think of your ceiling fan as a piece of precision machinery. You wouldn’t drive your car for years without a tire rotation; don’t expect your fan to provide silent comfort without a little mechanical love.


Conclusion: Take Control of Your Comfort

A wobbling ceiling fan is a distraction you don’t have to live with. With a simple yardstick, a $5 balancing kit, and thirty minutes of patience, you can transform a noisy, shaking fixture into a silent, efficient cooling machine.

Does your fan have a rhythmic “thump” that’s been driving you crazy? Try the yardstick test today and see which blade is the culprit. If you run into a stubborn wobble that won’t go away, or if you’re unsure about your mounting bracket, drop a comment below—I’ve tackled thousands of these and I’m here to help you get your home back to a state of perfect equilibrium!

Surface Asset Protection: Implementing Floor Protection Paper for Site Maintenance

Source:https://spriteshield.com

You’ve just spent three weeks and a significant portion of your savings installing gorgeous, wide-plank white oak flooring. It’s the centerpiece of your home renovation. Then, a contractor walks in with a heavy tool chest, drags it across the hallway, and—crunch. A deep, jagged gouge mars the finish. In that split second, your brand-new “asset” has depreciated by thousands of dollars.

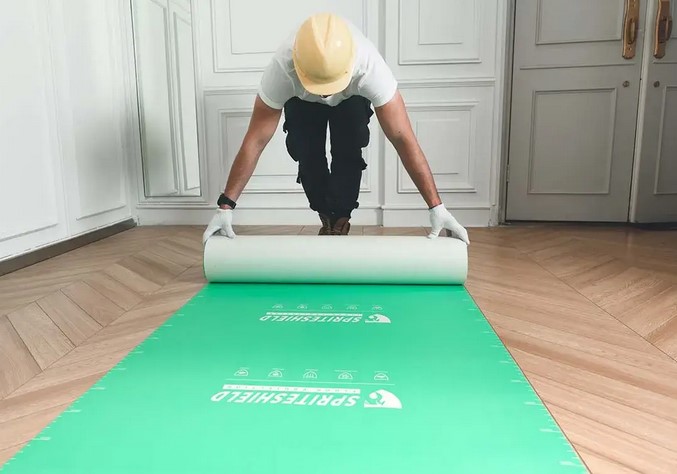
In my 10-plus years of managing job sites, I’ve learned that the difference between a professional finish and a DIY disaster isn’t just the quality of the paint or the tile; it’s the quality of the Floor Protection Paper used before the first hammer even swings. Most beginners view floor prep as an annoying chore. I view it as cheap insurance for your home’s most vulnerable surfaces.

The High Cost of “Saving Time” on Prep

When I first started in this industry, I thought a few old bedsheets or some thin plastic drop cloths were enough. I was wrong. I once saw a spilled gallon of dark mahogany stain seep right through a “heavy-duty” plastic sheet on a windy day, ruining a client’s marble foyer.

The reality is that construction sites are combat zones for flooring. Between dropped screwdrivers, muddy work boots, and the constant vibration of power tools, your floors are under siege. Using a dedicated Floor Protection Paper isn’t just about cleanliness; it’s about structural surface integrity. It provides a sacrificial layer that takes the beating so your hardwood, tile, or stone doesn’t have to.

The “Body Armor” Analogy

Think of your floor like a high-end smartphone. You wouldn’t dream of carrying it around without a screen protector and a sturdy case. Floor Protection Paper is the tempered glass for your home. It’s a thin, resilient shield designed to absorb impact and resist liquids, ensuring that the “screen” underneath remains flawless until the reveal.

Technical Breakdown: Choosing the Right Floor Protection Paper

Not all paper is created equal. If you go to a local hardware store, you’ll see rolls of brown paper that look identical. However, for serious site maintenance, you need to understand the technical specs.

1. Thickness and Weight (Mils and Points)

Professional-grade paper is usually measured in “mils” or “points.” For a medium-duty renovation, you want something at least 10 to 20 mils thick.

  • The Pro Insight: If you are moving heavy appliances like a refrigerator or a range, skip the thin red rosin paper. You need a heavy-duty construction board (often called Ram Board or similar) that can withstand the high-point pressure of appliance wheels.

2. Breathability and Vapor Permeability

This is the most critical technical factor for new builds. If you’ve just finished staining wood or pouring concrete, the surface needs to “breathe” to cure properly.

  • LSI Keywords: Vapor-permeable, curing process, moisture entrapment.

  • Using a non-breathable plastic can trap moisture, leading to “clouding” in the finish or even mold growth under the protection. A high-quality Floor Protection Paper allows gasses to escape while keeping liquids out.

3. Spill Resistance

Look for paper that has a specialized coating. You want a paper that can hold a puddle for at least 30 minutes without soaking through. This gives you time to find a rag and clean up that spilled coffee or paint water before it hits the subfloor.

Step-by-Step: The Professional Layout Strategy

Most beginners just roll the paper out and hope for the best. To scale your operational efficiency, you need a systematic approach.

The “Overlap and Tape” Method

  1. Sweep Twice: Never lay paper over a dirty floor. A single grain of sand trapped under your paper acts like sandpaper under the weight of your boots, scratching the floor as you walk.

  2. The 3-Inch Overlap: When laying parallel runs of Floor Protection Paper, overlap the seams by at least 3 inches.

  3. Seam Tape vs. Perimeter Tape: Use heavy-duty seam tape (usually blue or brown) to join the paper to itself. Never tape the paper directly to the floor with high-tack tape. Use a low-tack “delicate surface” painter’s tape for the edges where the paper meets the baseboards.

Managing High-Traffic Zones

In hallways and entryways, I always double-layer. The “pivot points”—where workers turn a corner—experience the most friction. A double layer of Floor Protection Paper ensures that even if the top layer tears, the bottom layer stays intact.

Expert Advice: The “Hidden” Dangers of Rosin Paper

For years, “Red Rosin Paper” was the industry standard. But I have a warning for you: Beware of the red dye. > Expert Warning: If Red Rosin Paper gets wet (from a leak or a spill), the red dye can bleed directly into the grain of unfinished wood or the grout lines of light-colored tile. It creates a permanent stain that is a nightmare to remove. If you are working with expensive or porous materials, always opt for a non-staining, brown kraft-style Floor Protection Paper.

Scaling Flexibility: Beyond Just Floors

Site maintenance isn’t limited to the ground. In my projects, we use the versatility of Floor Protection Paper to scale our protection to other assets:

  • Countertop Protection: When the plumbers are installing faucets, we wrap the granite or quartz countertops in paper to prevent scratches from wrenches.

  • Stair Treads: Stairs are the most dangerous part of a job site. Using pre-creased paper designed for stairs ensures the protection doesn’t slide underfoot.

  • Dust Control: Taping paper over HVAC vents prevents fine drywall dust from entering your furnace system—a mistake that can cost you a $500 duct cleaning later.

Maintenance and Disposal: The Clean Exit

The mark of a true pro isn’t just how they start, but how they finish.

  • Daily Inspection: At the end of every workday, walk the site. If you see a tear in the Floor Protection Paper, patch it immediately with tape. A small hole today is a floor scratch tomorrow.

  • The “Roll and Tape” Disposal: When the project is over, don’t just rip the paper up. Roll it inward so all the dust and debris stay trapped inside the roll. This prevents a “dust cloud” from settling on your freshly painted walls during the final cleanup.

The Bottom Line: ROI of Surface Protection

Let’s talk numbers. A 100-foot roll of high-quality Floor Protection Paper might cost you $30 to $60. Refinishing a damaged hardwood floor costs between $3 and $8 per square foot. For a standard living room, that’s a $1,500 risk vs. a $50 investment. From a professional standpoint, the peace of mind you get from knowing your surfaces are “armored” allows you to work faster and with more confidence. You aren’t constantly looking down; you’re looking at the task at hand.

Conclusion: Don’t Cut Corners on the Cover-Up

Surface asset protection is the unsung hero of home improvement. By implementing a systematic approach to site maintenance with the right Floor Protection Paper, you transition from a “weekend warrior” to a disciplined craftsman. You protect your investment, reduce your stress, and ensure that the “big reveal” at the end of your project is one of joy, not regret.

What’s the most expensive “oops” moment you’ve ever had on a project? Have you ever had a spill soak through your protection? Share your stories in the comments below—I’d love to help you troubleshoot your next site prep!

Portable Access Solutions: Scaling Operational Flexibility with the Step Ladder Folding

Source:https://www.solmha.com

You are standing on your tip-toes atop a rickety kitchen chair, reaching for a recessed light bulb that just flickered out. Your knees are wobbling, the chair is groaning, and for a split second, gravity feels like an impending threat. According to hospital safety data, ladder-related accidents account for over 160,000 emergency room visits annually in the U.S. alone—and a huge chunk of those happen because homeowners use the wrong tool for a “quick” task.

In my decade of navigating attic joists and hanging heavy crown molding, I’ve learned that a high-quality Step Ladder Folding system isn’t just a convenience; it’s your primary safety tether to the vertical world. It is the bridge between a project finished with a smile and a weekend spent in a cast.

The Evolution of Vertical Mobility

When I first started in the trades, ladders were heavy, wooden behemoths that left splinters in your palms and took two people to move. Today, we’ve entered an era of “operational flexibility.”

Modern engineering has transformed the humble ladder into a precision instrument. A Step Ladder Folding unit today is designed to be a “transformer” for your home—compact enough to hide behind a laundry room door, yet sturdy enough to support a 300-pound professional carrying a bucket of joint compound.

Technical Breakdown: Anatomy of a Pro-Grade Step Ladder Folding System

Choosing a ladder is like buying tires for your car. You don’t just want the ones that fit; you want the ones that won’t fail when the pressure is on. Here is what I look for when auditing a client’s workshop.

1. Duty Ratings and Load Capacity

Never overlook the sticker on the side of the rail. The American National Standards Institute (ANSI) categorizes ladders into “Types.”

  • Type IA (300 lbs) or Type IAA (375 lbs): These are my go-to. Even if you don’t weigh 300 lbs, the extra “stiffness” in the rails prevents the terrifying swaying sensation when you reach for a corner.

  • Type III (200 lbs): Avoid these for anything other than very light dusting. They lack the torsional rigidity required for actual home improvement.

2. Material Science: Aluminum vs. Fiberglass

This is the most frequent question I get.

  • Aluminum: Lightweight and corrosion-resistant. Perfect for painting, cleaning gutters, or general maintenance.

  • Fiberglass: This is non-negotiable if you are doing electrical work. Aluminum conducts electricity; fiberglass does not. If you are changing a ceiling fan or working near a circuit breaker, the fiberglass Step Ladder Folding is your life insurance policy.

3. Pinch-Proof Spreaders and Slip-Resistant Feet

Look for “pinch-proof” spreaders—the metal braces that lock the ladder open. Cheaper models have thin hinges that can bite your fingers during setup. High-end models use internal spreaders or recessed designs that are much safer for high-speed workflows.

Strategic Workflow: Why Folding Design Wins Every Time

Think of a folding ladder like a Swiss Army Knife for your height. A fixed-height ladder is great for one specific task, but a folding step ladder is a multi-tool.

The “Triangle of Stability”

In geometry and engineering, the triangle is the strongest shape. A Step Ladder Folding unit utilizes this principle to distribute your weight evenly across four points of contact. Unlike an extension ladder that leans against a wall (and can slide sideways), a step ladder is self-supporting. This allows you to work in the middle of a room—essential for light fixtures or ceiling repairs.

Storage Optimization

Space is a finite resource in most homes. The “folding” aspect allows for a profile as thin as 4 inches. I’ve seen homeowners maximize their “Operational Flexibility” by mounting their ladders on heavy-duty wall hooks in the garage, keeping the floor clear for larger power tools.

Expert Insight: The “Hidden” Dangers of the Top Step

There is a reason the top platform of a Step Ladder Folding unit usually has a big “NOT A STEP” warning.

Expert Advice: The Belt Buckle Rule

When you are on a ladder, keep your belt buckle between the two side rails at all times. The moment your buckle moves outside that frame, your center of gravity shifts, and the ladder becomes a catapult. Also, never stand on the top two rungs. If you can’t reach the target while standing three rungs from the top, you don’t need a better reach—you need a taller ladder.

Scaling Flexibility: Specialized Features for Intermediate Users

For those of you moving beyond basic bulb-changing into serious renovations, keep an eye out for these “Tier 2” features:

  • Integrated Project Trays: Many pro-grade folding ladders now feature “Holster Tops.” These have specific slots for screwdrivers, drill holsters, and paint cans. This prevents the “up-and-down” fatigue of climbing for every single screw.

  • Multi-Position Feet: Some high-end Step Ladder Folding models have adjustable legs for use on stairs. If you’ve ever tried to paint a stairwell, you know that a standard ladder is useless there.

  • LSI Keywords to Search: Torsional rigidity, spreader bars, rung depth, flared base, and non-conductive side rails.

Maintenance: Protecting Your Access Asset

A ladder is a mechanical tool, and it needs a “health check” once a year.

  1. The Foot Check: Look at the rubber feet (shoes). If they are worn down to the metal, the ladder will slide on hardwood or tile like a hockey puck. You can buy replacement feet for most major brands.

  2. The Rivet Inspection: Look for loose rivets or cracks in the fiberglass. If you see “stress whitening” (a pale mark on the plastic or metal), the structural integrity is compromised.

  3. The Cleaning: Spilled paint isn’t just ugly; it can hide cracks in the rungs. Keep your Step Ladder Folding clean with a simple degreaser.

The ROI of Professional-Grade Access

From a Home Improvement Expert’s perspective, a $150 investment in a top-tier ladder pays for itself the first time you don’t fall. It speeds up your painting by 20%, makes gutter cleaning a 15-minute task instead of an hour-long ordeal, and gives you the confidence to tackle high-ceiling branding and lighting projects that would otherwise require hiring a contractor.

Conclusion: Reach Your Potential

Your home is a three-dimensional puzzle. To solve it, you need to be able to move vertically with total confidence. A Step Ladder Folding system is the most overlooked “power tool” in the garage, yet it is the one you will likely use more than your drill or your saw.

By understanding the technical duty ratings, choosing the right material for the job, and respecting the “Belt Buckle Rule,” you turn a potentially dangerous task into a streamlined, professional operation.

Have you ever had a “near-miss” on an old ladder? Or are you currently debating between an aluminum or fiberglass model for your next project? Let me know in the comments—I’d love to help you find the perfect height for your home!