HVAC Performance Analysis: Monitoring Airflow Efficiency with the Anemometer Air Flow

Source:https://www.sussexdampexperts.com

Imagine sitting in your living room on a blistering 95°F afternoon. Your AC is humming, the vents are open, but you’re still sweating through your shirt. You walk over to the register, feel a weak, lukewarm breeze, and sigh. Most homeowners assume the “freon” is low or the compressor is dying, but in my ten years of crawling through attics and troubleshooting temperamental systems, I’ve found that the culprit is often invisible: poor airflow.

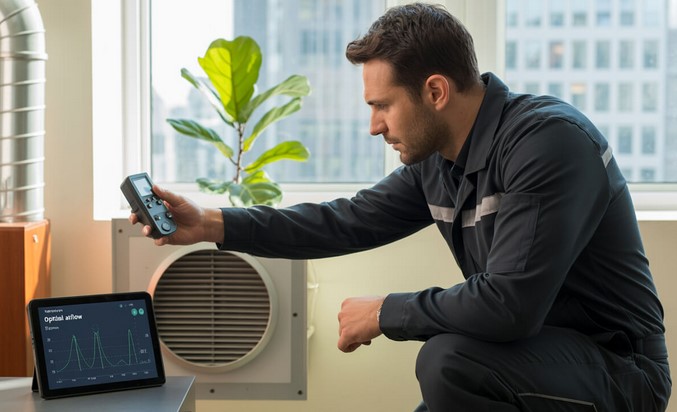
I once spent four hours at a client’s house who was convinced they needed a $10,000 system replacement. Their vents were blowing, but the house felt like a sauna. When I pulled out my anemometer air flow meter, the data told a different story. The air was moving at barely 200 Feet Per Minute (FPM) when it should have been hitting 500. The fix wasn’t a new unit; it was a crushed duct and a dirty coil. That $150 tool saved them thousands.

In this deep-dive, we’re going to look past the thermostat and get into the “lungs” of your home. We’ll explore how professional-grade monitoring can turn a sluggish HVAC into a high-performance machine.

Why Airflow is the Lifeblood of Your Home

To understand HVAC, you have to stop thinking about “cold air” and start thinking about energy transfer. Your HVAC system is basically a giant heat sponge. If air doesn’t move across the coils at the right speed, that sponge can’t soak up the heat from your rooms.

Think of your HVAC system like a marathon runner wearing a heavy mask. The runner has the muscles (the compressor) and the lungs (the blower motor), but if the mask (restricted airflow) prevents them from breathing properly, they will collapse long before the finish line.

When you use an anemometer air flow device, you are essentially checking the runner’s oxygen levels. Without enough air passing through the system, the evaporator coil gets too cold and freezes into a block of ice, or the furnace heat exchanger gets too hot and cracks. Both are “death sentences” for your equipment.

Mastering the Anemometer Air Flow Tool

For the uninitiated, an anemometer is a device used to measure wind speed and pressure. In the HVAC world, we specifically use digital vane or hot-wire anemometers to calculate CFM (Cubic Feet per Minute). This is the magic number that tells us if your system is actually doing its job.

Choosing the Right Tool for the Job

If you’re a DIY enthusiast or a junior tech, you’ll encounter two main types:

  • Vane Anemometers: These look like small fans. They are excellent for measuring airflow at large return grilles or supply registers. They are rugged and easy for beginners to read.

  • Hot-Wire Anemometers: These use a tiny, heated wire to detect air movement. They are incredibly sensitive and perfect for reaching inside ductwork through a small “static pressure” hole to see what’s happening deep in the system.

How to Take an Accurate Reading

Measuring anemometer air flow isn’t as simple as holding it up to a vent for a second. Airflow is turbulent. To get a real reading, you need to perform a “traverse.” This involves moving the sensor across the entire opening of the vent in a grid pattern to get an average speed.

If you just measure the center, you might get a “hot spot” of high velocity that doesn’t represent the actual volume of air entering the room. Precision is the difference between a guess and a diagnosis.

Calculating CFM: The Math Behind the Comfort

Once you have your velocity reading in FPM (Feet Per Minute) from your anemometer air flow meter, you need to convert it to CFM. This is where the technical side meets practical application.

The formula is simple:

$$CFM = Velocity (FPM) \times Area (Square Feet)$$

If you have a vent that is 1 foot by 1 foot (1 sq. ft) and your anemometer reads 400 FPM, you are moving 400 CFM. Most residential systems require roughly 400 CFM per ton of cooling. If you have a 3-ton unit, you need to see a total of 1,200 CFM moving through your ductwork.

When I find a 3-ton system only pushing 800 CFM, I know immediately that the blower speed needs adjustment, the ductwork is undersized, or the filter is way too restrictive.

Common Airflow Killers Found via Monitoring

In my experience, the anemometer air flow readings don’t lie, even when the homeowner thinks everything is fine. Here are the most common “invisible” issues I find:

1. The “High-Efficiency” Filter Trap

We all want clean air, but those ultra-thick MERV 13 filters can be like breathing through a thick wool blanket. I’ve seen brand-new systems struggle because the filter was so dense the blower couldn’t pull air through it. Always check your FPM before and after a filter change.

2. Leaky Ductwork

If your anemometer air flow reading is 1000 CFM at the furnace but only totals 600 CFM when you add up all the room registers, you have a massive leak. You’re essentially paying to air condition your attic or crawlspace.

3. Crushed Flex Ducts

Flex duct is convenient, but it’s fragile. I’ve seen ducts crushed by boxes in the attic or kinked during installation. A visual inspection might miss it, but a drop in FPM at the register is a “smoking gun.”

Tips Pro: The Hidden Warning

High air velocity doesn’t always mean a healthy system. If your vents are “whistling” or loud, your velocity might be too high because your ducts are too small. This creates High Static Pressure, which wears out blower motors prematurely. Aim for a “quiet” velocity—usually between 500 and 700 FPM at the register for optimal comfort and equipment longevity.

DIY vs. Professional Monitoring

Can a beginner use an anemometer air flow meter? Absolutely. In fact, I encourage it. If you’re a homeowner, buying a basic vane anemometer can help you balance your own home.

How to balance your home:

  1. Take readings at every vent.

  2. Identify “weak” rooms (low FPM).

  3. Slightly close dampers in rooms with “excessive” FPM to force more air toward the weak rooms.

  4. Re-measure to ensure you haven’t choked the overall system airflow.

However, if you find that your total CFM is significantly lower than your unit’s rating, it’s time to call a pro. Issues like a fouled evaporator coil or a failing capacitor in the blower motor require specialized tools and safety knowledge that go beyond a simple handheld meter.

The Long-Term Benefits of Airflow Analysis

Monitoring your system isn’t just about comfort; it’s about the checkbook. A system with optimized anemometer air flow performance:

  • Reduces Energy Bills: Your unit runs shorter cycles to reach the target temperature.

  • Extends Equipment Life: Components don’t overheat or freeze, reducing wear and tear.

  • Improves Air Quality: Proper circulation ensures your air is actually passing through the filtration system as intended.

Your HVAC system is the most expensive appliance in your home. Treating it like a “black box” that you only touch when it breaks is a recipe for high bills and early replacements. By understanding the basics of airflow and using an anemometer air flow tool, you take control of your environment.

Next time your house feels “stuffy,” don’t just turn down the thermostat. Grab a meter, check your vents, and see if your system is actually breathing.

Have you ever checked the airflow in your home? Maybe you have a room that is always five degrees warmer than the rest? Drop a comment below or ask a question about your specific duct setup—I’d love to help you get your system running at peak efficiency!

3 Questions Every Homeowner Should Ask a Roofer Before Starting a Project

When you hire a roofer, there are a lot of things that you hand over to them. You give them your trust, finances for services rendered and peace of mind. Whether you’re dealing with storm damage or planning ahead, choosing the right professional matters. If you’re searching for a Roofer Ormskirk, asking the right questions upfront can save you from headaches later. Most roofing problems don’t come from bad materials, but from bad decisions made before the first nail is driven. So before the ladders go up and the paperwork is signed, pause for a second. Ask. Listen. And don’t feel awkward about it because you’re protecting your home. Here are three questions you should ask.

1. Can You Show Me Proof of Licensing, Insurance, and How to Reach You?

This might feel like an obvious one, but most homeowners are likely to skip it because they assume all roofers are licensed and insured. But assumptions don’t hold up when something goes wrong. Asking directly isn’t rude. It’s responsible. A professional roofer will expect this question and answer it without hesitation.

Licensing tells you they’re legally allowed to do the work. Insurance protects you if there’s an accident on your property. Without it, you could be on the hook for damages or injuries, and that’s a nightmare scenario no one wants to deal with. If a roofer gets uncomfortable or vague when you ask? That’s your cue to slow things down.

Some people also overlook a very important detail: accessibility. Do they have a clear Contact Page on their website? A real address? A phone number that gets answered? Fly-by-night roofers often disappear once the job is done, or when issues pop up. You want someone you can reach months later, not someone who vanishes the moment the invoice is paid.

2. What Exactly Is Included in This Quote, and What Isn’t?

Roofing quotes can be confusing. But here’s the thing: quotes aren’t created equal. Some look cheaper because they leave things out. And that’s where trouble starts.

Ask your roofer to walk you through the estimate. What materials are they using? Are they replacing underlayment or just patching over it? What about flashing, vents, or cleanup afterward? The more detail, the better. A roofer who’s confident in their work won’t rush this explanation.

And don’t forget to ask about surprises. What happens if they find hidden damage once the old roof comes off? Will that cost extra? How is that handled? Roofing projects often uncover issues you can’t see from the ground, and you don’t want to be blindsided halfway through the job.

3. Who Will Be Doing the Work on My Roof?

This question matters more than it sounds. You might meet with one person during the estimate, and a different person during the project. Some companies subcontract the work, while others use in-house crews. Neither is automatically bad, but you deserve to know.

Ask about the experience of the crew. How long have they been roofing? Do they work together regularly, or is it a rotating team? Consistency matters. A crew that’s familiar with each other tends to work more efficiently and make fewer mistakes.

Also, ask who’s supervising the job. If you have questions during the project, or concerns, who do you talk to? Knowing there’s a clear point of contact will ease a lot of anxiety. Having someone accountable on-site makes the whole process feel more manageable.

Summing Up

You need to feel confident when you hire a roofer. Asking these questions will help you be informed and make things easy for you. Good roofers appreciate informed homeowners because it leads to fewer misunderstandings and better results. Take the time to ask the right questions before a project starts because it will help you have peace of mind.


Strategic Storage Management: Maximizing Capacity with the Closet Rod System

You open your closet doors Monday morning, and instead of a streamlined selection of outfits, you’re met with a fabric landslide. A shirt is wedged so tightly between two coats that it looks like it’s been through a vacuum sealer, and the rod itself is bowing ominously in the middle like a bridge under too much stress. If this sounds familiar, you aren’t just messy—you’re likely dealing with a failure in “closet physics.”

In my ten years of renovating homes and optimizing tight urban spaces, I’ve seen more collapsed closet rod setups than I care to count. Most people treat their closet rod as a simple “set it and forget it” utility. In reality, the closet rod is the structural spine of your entire storage ecosystem. When you master the rod system, you don’t just find a place for your clothes; you effectively double your usable square footage without moving a single wall.


The Hidden Mechanics of a High-Performance Closet Rod

When I walk into a client’s home, the first thing I check isn’t the color of the shelving; it’s the diameter and material of the closet rod. Think of your closet rod as the suspension bridge of your wardrobe. If the “cables” (brackets) and the “deck” (the rod itself) aren’t synced, the whole system is destined for a catastrophic failure.

Most builder-grade closets come with thin, hollow steel or—heaven forbid—flimsy wood rods that are too long for their own good. For a beginner, the most important technical data point to remember is the deflection rate. This is how much the rod bends under weight. A standard 1-inch steel rod will start to show visible stress at about 48 inches of length if it doesn’t have a center support.

To maximize capacity, you need to transition from “hanging space” to “zonal management.” This starts with selecting a heavy-duty chrome or stainless steel closet rod with a wall thickness of at least 2mm. This isn’t just for looks; it’s about ensuring that your winter coats don’t end up in a heap on the floor at 3 AM.


Strategic Height: The “Double Hang” Revolution

The biggest mistake I see intermediate DIYers make is mounting their closet rod at a single “standard” height. Usually, this is around 65 to 70 inches from the floor. This leaves a massive “dead zone” underneath where shoes pile up in a chaotic mountain.

If you want to maximize capacity, you must embrace the Double Hang System. Here is how we break it down:

  • Top Rod (High Zone): Mount this at approximately 80–84 inches. This is for out-of-season items or shorter pieces like folded trousers and shirts.

  • Bottom Rod (Active Zone): Mount this at 38–42 inches. This creates a second tier of storage for skirts, folded jeans, and tops.

By using this vertical stacking method, you are effectively taking a 5-foot wide closet and turning it into 10 feet of linear hanging space. It’s like building a skyscraper instead of a ranch-style house; when you can’t go wider, you must go higher.


Material Matters: Wood vs. Metal vs. Oval

Choosing the right closet rod material is where the data meets the aesthetic. In my experience, each material serves a specific “weight class” of clothing.

1. The Classic Round Steel Rod

This is the workhorse of the industry. I recommend a chrome-plated finish because it allows hangers to slide with minimal friction. If you’ve ever had to “tug” a hanger across a painted wooden rod, you know how frustrating that resistance can be.

2. The Professional Oval Rod

If you look inside high-end custom boutiques, you’ll notice they rarely use round rods. They use oval closet rods. Why? Because the vertical orientation of an oval rod offers much higher resistance to bending (deflection) than a round rod of the same weight. It also provides a slimmer profile, which looks incredibly sleek.

3. The Traditional Hardwood Rod

Wood is beautiful but temperamental. If you insist on wood, you must use a diameter of at least 1-3/8 inches and stick to hardwoods like Oak or Maple. Avoid Pine; it’s too soft and will sag faster than a cheap mattress under a heavy load.


The Pro’s Secret: Support and Anchoring

A closet rod is only as strong as the wall it’s attached to. I’ve seen DIYers use high-end brass rods only to secure them into 1/2-inch drywall with plastic anchors. This is a recipe for disaster.

The “Expert Advice” here is simple: Always find the studs. A standard shirt weighs about 0.5 lbs, but a heavy wool coat can weigh 5 lbs. Over a 4-foot span, that weight adds up quickly.

  • Stud Alignment: Use a stud finder to ensure your end brackets are screwed directly into the wooden framing behind the drywall.

  • The 3-Foot Rule: If your closet rod span exceeds 36 inches, you must install a center support bracket. This prevents the “smile” effect (the rod sagging in the middle), which eventually pulls the end brackets out of the wall.


Organizing for Capacity: The “Breathe” Technique

Once your hardware is locked in, how you utilize the closet rod determines your daily stress levels. I teach my clients the “One-Finger Rule.” You should be able to slide a single finger easily between every garment on the rod.

If your clothes are packed so tight you have to use force to find a shirt, you aren’t just disorganized—you’re damaging your clothes. Tight packing prevents airflow, which leads to wrinkles and, in some climates, a musty odor or even mildew.

Maximize space by categorizing by length:

  1. Long Hang: One section for dresses and long coats.

  2. Medium Hang: A section for trousers (hung by the cuff).

  3. Short Hang: Two tiers for shirts and jackets.

By grouping by length, you clear up floor space under the “Short Hang” sections for modular drawers or shoe racks, creating a fully integrated system.


Pro Tip: The Hanger Factor

Never underestimate the power of the hanger. Throw away your mismatched plastic and wire hangers. Switch to slimline velvet hangers. They have a tiny footprint compared to bulky plastic ones, allowing you to fit up to 30% more clothing on the exact same closet rod. Plus, the friction keeps silky tops from sliding off into the “closet abyss.”


Common Pitfalls to Avoid

Even with the best closet rod, a few hidden dangers can ruin your project.

  • Over-Extending Telescoping Rods: Many hardware stores sell “adjustable” rods that slide out. These are convenient but inherently weak at the joint. If you use one, ensure the overlap is at least 6 inches, and always place a support bracket directly at the junction point.

  • Ignoring the “Return” Space: Don’t run your rod all the way into a deep corner where you can’t reach the clothes. Stop the rod 12 inches short of a deep corner and use that space for shelving or hooks for bags.

  • Incorrect Bracket Height: Ensure your brackets are perfectly level. A rod that is even 1/2 inch off-level will cause all your hangers to migrate toward the lower end, creating a bunched-up mess.


Conclusion: Take Back Your Space

Redesigning your storage with a strategic closet rod system isn’t just a home improvement project; it’s a lifestyle upgrade. When your clothes are visible, accessible, and properly supported, your mornings become faster and your wardrobe lasts longer.

Remember, the goal isn’t just to “fit more stuff.” The goal is to create a system where your items are treated with respect and your space works for you, rather than against you. Start by measuring your current span and checking for that dreaded “sag.”

Ready to transform your closet? Start by auditing your current rod—is it bowing? Is it too low? Let me know in the comments what your biggest closet struggle is, or share a photo of your DIY rod upgrade! I’d love to help you troubleshoot your specific space.

Custom Patio Enclosures: Create a Private and Comfortable Outdoor Area

Source:https://hollowaycompany.com

Outdoor living spaces have become an integral part of many homes, offering an oasis for relaxation, entertainment, and family gatherings. However, creating the perfect outdoor area often comes with challenges such as privacy, weather conditions, and pests. This is where custom patio enclosures come into play. By designing a tailor-made patio enclosure, you can create a private, comfortable outdoor retreat that not only enhances your home’s aesthetic but also provides functionality and protection from the elements. In this article, we will explore the benefits of custom patio enclosures, different types of designs available, and how they can transform your outdoor living experience.

1. What Are Custom Patio Enclosures?

Custom patio enclosures are fully or partially enclosed outdoor structures designed to extend the living space of your home. These enclosures are customizable to meet your needs and style preferences, offering an extra layer of protection and comfort. Unlike standard patio covers, custom enclosures typically include walls or screens that offer protection from wind, rain, and pests while still allowing you to enjoy natural light and fresh air.

A custom patio enclosure can be designed to fit a variety of sizes, styles, and purposes. Whether you want a fully enclosed, climate-controlled sunroom, a screened-in porch, or a semi-enclosed space with retractable screens, the possibilities are endless. The materials used for these enclosures can vary widely, from glass and acrylic panels to mesh screens or wooden slats, depending on the level of visibility, ventilation, and protection you desire.

Key Components of a Custom Patio Enclosure

  1. Structure: The framework for your patio enclosure can be made from a variety of materials, including aluminum, wood, steel, or vinyl. These materials are chosen for their durability, aesthetic appeal, and ability to withstand the elements.
  2. Walls and Screens: Depending on your preferences, you can choose from different types of walls or screens. For example, glass panels provide unobstructed views and weather protection, while mesh screens keep insects out while allowing airflow.
  3. Roof: The roof of your patio enclosure can be solid or transparent, depending on whether you want full protection from the sun or wish to let natural light in. Transparent roofing materials like polycarbonate or acrylic can help maximize sunlight while still providing protection from rain.
  4. Flooring: The floor of a custom patio enclosure can be finished with a range of materials, such as tile, wood decking, concrete, or outdoor carpeting. The right choice will depend on how you plan to use the space and the overall style of your patio.

2. The Benefits of Custom Patio Enclosures

Investing in a custom patio enclosure offers a host of advantages for homeowners looking to make the most of their outdoor spaces. Here are some of the key benefits of adding a custom enclosure to your home:

1. Increased Privacy

One of the most significant advantages of a custom patio enclosure is the privacy it provides. If your home is located in a neighborhood with high foot traffic or your outdoor space is exposed to neighbors, a custom enclosure can create a secluded area where you can relax without feeling exposed. Custom walls or privacy screens can be added to the enclosure, ensuring that your outdoor oasis remains shielded from prying eyes.

For those who love to entertain, a private, enclosed patio offers a perfect setting for family gatherings, dinner parties, or quiet afternoons. You can enjoy your time outdoors without worrying about the distractions of passersby or noise from neighboring properties.

2. Protection from the Elements

A custom patio enclosure also offers protection from the weather, allowing you to enjoy the outdoors regardless of the season. Whether you want to shield yourself from the intense summer heat, occasional rain, or chilly winds, the enclosure helps extend your outdoor living season. During the hot summer months, an enclosed patio can provide shade and cooling breezes, making it a comfortable spot for dining or lounging. In colder weather, adding insulation or space heaters to the enclosure can help create a cozy retreat.

If you live in an area with unpredictable weather patterns, such as frequent storms, having an enclosed space gives you peace of mind knowing that your furniture and outdoor decorations are protected from the elements.

3. Enhanced Comfort and Functionality

A custom patio enclosure can be tailored to suit your lifestyle and specific needs. You can incorporate features like ceiling fans, built-in lighting, or even retractable glass doors for easy access to your yard. Some homeowners opt for custom enclosures with heating and cooling systems, turning their patio into an all-season living area.

Custom enclosures also offer a high level of versatility. Whether you want a space for dining, a home office, a hobby area, or simply a place to unwind, the layout and design of your custom patio enclosure can be adjusted to suit your functional needs. The enclosed space provides shelter from bugs, making it more enjoyable to spend time outdoors in the evening or during the warmer months.

4. Increased Home Value

Adding a custom patio enclosure is a smart investment that can increase your home’s value. A well-designed enclosure can serve as a selling point for potential buyers, especially if you live in an area where outdoor living spaces are highly desirable. An enclosed patio offers more usable square footage, which can be appealing to buyers looking for flexible, functional spaces.

In addition to enhancing the visual appeal of your home, a custom patio enclosure can make your property stand out in the competitive real estate market, especially if it offers year-round usability and enhanced comfort.

3. Choosing the Right Design for Your Custom Patio Enclosure

When designing a custom patio enclosure, there are several factors to consider to ensure that it meets your needs and enhances your outdoor space. Here are a few key design elements to keep in mind:

1. Determine the Purpose

Before designing your custom patio enclosure, decide how you intend to use the space. Do you want it to function as an outdoor dining area, a reading nook, a play area for children, or an entertainment space? Understanding the purpose of the enclosure will help guide the design, ensuring it provides the functionality you require.

2. Choose the Right Materials

The materials you choose for your custom patio enclosure will significantly affect its appearance, durability, and performance. If you want to maintain an open, airy feel, opt for glass panels or mesh screens. If privacy and insulation are more important to you, consider solid walls or more opaque materials. Additionally, the material of the frame will impact the overall look and longevity of the structure. Aluminum and vinyl are low-maintenance options, while wood offers a natural, warm aesthetic.

3. Consider Climate and Location

The climate in your area plays a significant role in determining the design of your patio enclosure. If you live in a region with extreme temperatures, you may want to consider insulation, heating, or cooling options for your enclosure. Similarly, consider the direction your patio faces. If it’s exposed to a lot of direct sunlight, you might need a roofing system that provides shade, such as a polycarbonate roof or retractable awnings.

4. Add Functional Features

Think about additional features that can enhance the functionality of your patio enclosure. Built-in seating, storage, lighting, or even an outdoor kitchen are all possibilities to make your enclosure more enjoyable and useful. Don’t forget to incorporate elements like ceiling fans for airflow or heating options for comfort during colder months.

Custom patio enclosures are an excellent way to create a private, comfortable outdoor area that can be used year-round. With the ability to customize every aspect of the design, from the materials to the layout, you can craft a space that suits your needs while enhancing the aesthetic appeal of your home. Whether you’re looking for a private retreat, a place to entertain, or simply a comfortable area to enjoy the outdoors, custom patio enclosures offer versatility, protection, and style. Investing in a custom enclosure not only enhances your quality of life but also adds value to your home, making it a smart choice for homeowners who want to maximize their outdoor living potential.

Decorative Fence Panels: Enhance Your Yard’s Appearance with Stylish Panels

Source:https://www.exoticpebblesandglass.com

Your yard is more than just an outdoor space; it’s an extension of your home, a place to relax, entertain, and showcase your personal style. One of the simplest and most effective ways to enhance the aesthetics of your yard is by installing decorative fence panels. These panels not only serve as functional barriers, offering privacy and security, but they also elevate the visual appeal of your outdoor space. Whether you want to create a rustic charm, a modern vibe, or a traditional look, decorative fence panels can transform your yard into a beautiful, well-defined area. In this article, we’ll explore the benefits of decorative fence panels, the different styles available, and how to incorporate them into your outdoor design.

1. What Are Decorative Fence Panels?

Decorative fence panels are an upgraded version of traditional fencing, designed to offer both privacy and visual interest. Unlike standard fence panels, which are typically plain and functional, decorative panels come with intricate patterns, designs, or finishes that make them stand out. These panels can be made from a variety of materials, including wood, vinyl, metal, and composite, allowing homeowners to choose the best option for their needs and style preferences.

The primary function of decorative fence panels remains the same as conventional fences: to define boundaries, ensure privacy, and provide security. However, they go a step further by adding an element of design to your yard. Whether you’re enclosing a garden, creating a secluded outdoor retreat, or enhancing the curb appeal of your home, decorative fence panels allow you to infuse beauty into your landscape.

Materials Used for Decorative Fence Panels

  1. Wood: Wood is one of the most popular materials for decorative fence panels. It offers a natural look and can be customized with various finishes or stains. From traditional picket fences to modern slatted designs, wooden fence panels can add warmth and texture to your yard.
  2. Vinyl: Vinyl is a low-maintenance option that is resistant to the elements. It can be molded into a variety of decorative styles, and it doesn’t require the frequent upkeep that wood does. Vinyl panels are available in many colors and patterns, making them a versatile choice for any landscape.
  3. Metal: Metal decorative fence panels, such as wrought iron or aluminum, are ideal for creating a more formal or industrial aesthetic. These panels are often intricately designed and can be customized with different finishes, from matte black to shiny bronze.
  4. Composite: Composite materials, made from a mix of wood fibers and plastic, provide the best of both worlds. They have the natural appearance of wood but are more durable and resistant to weathering, making them an excellent option for outdoor use.

2. The Benefits of Installing Decorative Fence Panels

Decorative fence panels offer several practical and aesthetic advantages that make them an excellent choice for homeowners looking to improve their yards. Here are some key benefits:

1. Enhanced Curb Appeal

One of the most immediate benefits of decorative fence panels is the dramatic improvement in your home’s curb appeal. The right fence panel design can complement the style of your house, adding a polished and inviting look to your front yard or garden. Whether you choose a sleek, modern design or a more intricate, vintage-inspired panel, decorative fences provide an attractive focal point that can enhance your home’s overall exterior.

Additionally, a beautifully designed fence can increase your property’s value. Homes with well-maintained landscapes and stylish features like decorative fences are more likely to attract potential buyers.

2. Increased Privacy and Security

While decorative fence panels are visually appealing, they also serve a functional purpose. They provide privacy and security by blocking the view from the outside and securing your yard from unwanted intruders. Many decorative designs offer full coverage, allowing you to enjoy your outdoor space without feeling exposed to the street or neighboring properties.

In areas with high foot traffic or close proximity to neighbors, privacy is essential. Decorative panels can be designed to fit your specific needs, whether you prefer a solid panel for complete seclusion or a semi-solid design that allows for some visibility while still maintaining a sense of privacy.

3. Durability and Low Maintenance

Unlike traditional wooden fences that may require frequent maintenance, such as painting, sealing, or staining, many decorative fence panels are made from low-maintenance materials like vinyl or composite. These materials resist fading, warping, and rotting, ensuring your fence stays looking great for years to come with minimal effort.

For example, vinyl fences do not require regular cleaning or sealing, and metal fences can be treated with powder coatings that protect them from rust and corrosion. This durability makes decorative fence panels a long-term investment, saving you both time and money in upkeep.

4. Customization and Versatility

Another major benefit of decorative fence panels is the wide variety of styles and customization options available. Homeowners can choose from various materials, colors, and designs to match their specific tastes and landscaping needs. Whether you want a classic white picket fence, a contemporary slatted design, or an ornate wrought-iron panel, there’s a decorative fence panel to suit any style.

You can also opt for different heights, lengths, and configurations depending on the layout of your yard. For instance, a taller panel might be perfect for creating a private retreat, while a shorter design could be used to define a garden or patio area. This versatility allows you to tailor your fence to your unique needs and preferences.

3. How to Choose the Right Decorative Fence Panels for Your Yard

Selecting the right decorative fence panels involves considering several factors, such as the overall aesthetic of your home, your budget, and the purpose of the fence. Here are some tips to help you make the best decision:

1. Consider the Style of Your Home

When choosing decorative fence panels, it’s essential to consider the architectural style of your home. A modern home may benefit from sleek, minimalist panels, while a traditional home might be better suited to a more intricate or classic design. Try to match the materials and design of the fence to the overall look of your house for a cohesive and harmonious appearance.

For example, a farmhouse-style home could pair beautifully with a white wooden picket fence, while a contemporary house might look better with a geometric metal design or a horizontal slatted wood panel.

2. Determine the Purpose of the Fence

Before selecting a decorative fence, think about the main purpose it will serve. Are you looking for privacy, security, or simply a design feature to enhance your yard? If privacy is your primary concern, opt for solid panels that fully block the view, or a lattice design that offers some coverage without sacrificing airflow.

For those who want a fence for purely aesthetic purposes, choose panels with intricate patterns or decorative motifs that add character to your yard without necessarily offering complete privacy.

3. Assess Durability and Maintenance Needs

Different materials come with different maintenance requirements. Wooden fences may require regular painting or staining to prevent decay, while vinyl and composite fences are much lower maintenance. Consider the weather conditions in your area, as well as how much time you’re willing to spend on upkeep, when selecting the right material.

Metal fences, for instance, are ideal for areas with high winds or extreme weather, as they are sturdy and resistant to damage. Vinyl fences, on the other hand, are great for low-maintenance solutions that can stand up to all types of weather without fading or cracking.

Decorative fence panels are a fantastic way to enhance your yard’s appearance, offering both functionality and style. With a variety of materials and designs to choose from, these panels can be customized to fit any landscape, whether you’re looking to increase privacy, boost curb appeal, or create a focal point in your garden. By incorporating decorative fence panels into your yard, you can enjoy the perfect blend of beauty and practicality, all while elevating the overall aesthetic of your outdoor space. No matter your design preference, decorative fence panels are sure to transform your yard into a more inviting and visually appealing environment.