
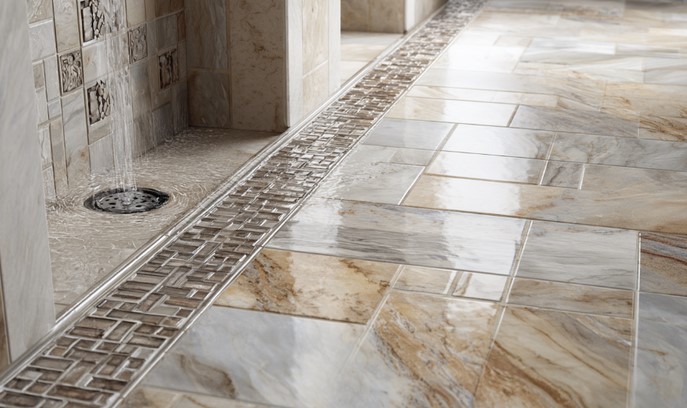
Source:https://capitalconstruction.com
A few years ago, I received an emergency call from a client whose primary bedroom ceiling had suddenly caved in directly above her dining room table. Below the gaping hole was a pile of wet drywall, ruined insulation, and a steady drip of soap-scum water. The culprit? A custom walk-in shower upstairs that had been remodeled just fourteen months earlier by a contractor who cut corners under the floor surface.
When I tore up the shower base, the problem was glaringly obvious: thinset mortar applied in swirls, zero pre-pitch under the liner, and large format tiles laid flat over a poorly sloped drain assembly. Water had been pooling beneath the surface, slowly rotting the subfloor until gravity took over.
That disaster cost the homeowner over $12,000 in structural repairs—all because of poor sub-surface execution.
Over my 10+ years as a residential remodeling specialist, I have learned that a flawless shower floor tile setup isn’t just about pick-and-place aesthetics. It is a high-performance hydraulic assembly engineered to shed gallons of water every single day without letting a single drop penetrate your home’s structural framing.
The Hydraulic Assembly: How a Shower Floor System Actually Works
To understand why shower tile installations fail, you have to dispel a common myth: tile and grout are not waterproof.
Think of your shower floor tile installation like a sloped rain jacket sitting on top of a concrete drainage bed. Cementitious grout is inherently porous, and micro-cracks naturally form over time. Water will pass through the tile layer.
The true magic happens underneath. The entire assembly must be designed as a dual-stage drainage system that funnels both surface water and subterranean moisture directly toward the weep holes of your shower drain assembly.
+--------------------------+-----------------------+-----------------------+-------------------------+
| Material / Component     | Water Absorption Rate | Slip Resistance (DCOF)| Primary Function        |
+--------------------------+-----------------------+-----------------------+-------------------------+
| Porcelain Mosaic Tile    | Very Low (< 0.5%)     | High (Via Grout Lines)| Primary Surface Wear    |
| Natural Stone (Marble)   | Moderate (1% - 5%)    | Variable (Needs Finish)| Aesthetic / Custom      |
| Modified Thinset Mortar  | Hydrophobic Additives | Exceptional Bond      | Structural Tile Adhesion|
| Epoxy Grout              | Zero (Impermeable)    | High                  | Impermeable Joint Seal  |
+--------------------------+-----------------------+-----------------------+-------------------------+
Material Selection: Choosing the Right Shower Floor Tile
Not every beautiful tile sitting on a showroom display board belongs on a wet, sloped shower pan. Selecting the wrong material creates severe slip hazards and chronic water retention issues.
1. The Power of Mosaic Format (1″x1″ to 2″x2″)
Large format tiles look sleek, but laying a 12″x24″ stiff porcelain tile over a multi-directional, sloped shower pan creates ugly “lippage” (uneven tile edges) and requires complex envelope cuts. Small mosaic tiles mounted on mesh sheets conform naturally to compound slopes while providing dozens of grout lines that act as built-in traction treads under wet feet.
2. Dynamic Coefficient of Friction (DCOF)
Always check the manufacturer’s technical data sheet for the DCOF rating before purchasing your shower floor tile. For wet bare-foot areas, choose tiles with a DCOF rating of 0.42 or higher. Textured porcelain mosaics or tumbled natural river rocks excel here.
3. Porosity and Water Absorption
Porcelain is engineered by firing clay at extreme temperatures, resulting in a water absorption rate of less than 0.5% (ANSI A137.1 standard). Natural stones like travertine, slate, or Carrara marble are far more porous, requiring high-grade impregnating sealers to prevent water staining and deep mineral discoloration.
Sub-Surface Engineering: Mortar Pans, Slope, and Waterproofing
Before a single piece of shower floor tile is pressed into mortar, the underlying substrate must meet strict slope and waterproofing guidelines set by TCNA (Tile Council of North America).
The Essential 1/4-Inch Slope Rule
A shower floor pan must slope downward toward the drain at a pitch of 1/4-inch per linear foot.
-
Too little slope: Water pools on top of the tile, leading to mold blooms, slimy grout, and stagnant odors.
-
Too much slope: Standing in the shower feels awkward, and furniture or glass enclosures become difficult to plumb.
Traditional Mortar Beds vs. Modern Sealed Foam Trays
-
Traditional Mud Bed (Pan Liner): Uses a pre-slope of deck mud underneath a PVC/CPE liner, followed by a secondary mortar bed. It is highly customizable for non-standard footprint shapes but requires heavy labor and long cure times.
-
Bonded Waterproofing Membranes (e.g., Schluter-KERDI, Hydro Ban): Modern topical sheet membranes or liquid-applied coatings sit directly beneath the thinset layer. This keeps the entire mortar bed dry, speeding up cure times and eliminating subterranean moisture buildup.
Step-by-Step Installation Protocol for Leak-Free Results
Installing tile on a shower floor requires methodical execution. Skimping on thinset coverage or rushing grout application guarantees premature system failure.
Expert Advice: Pro Tips and Hidden Pitfalls
⚠️ The Clogged Weep Hole Trap
If installing a traditional clamping ring drain with a vinyl pan liner, never block the lower weep holes with thick mortar! If thinset blocks these tiny weep slots, water trapped inside the mud bed cannot escape into the drain pipe. Protect weep holes by surrounding the drain assembly with pea gravel or specialized weep-hole protectors before packing deck mud.
Epoxy Grout vs. Cementitious Grout
While standard cementitious grout is cheap and easy to clean during installation, it remains porous and vulnerable to harsh chemical cleaners.
For high-use walk-in showers, upgrade to epoxy grout (ANSI A118.3). Epoxy resin creates an impermeable, stain-proof, and chemical-resistant joint that never requires sealing and prevents mold from rooting inside grout joints.
💡 Pro Tip from the Field
When installing natural pebble or stone mosaic sheets, do not lay the square mesh sheets directly end-to-end like graph paper! Doing so leaves visible square seam lines across your finished floor. Instead, cut along the wavy edges of the mesh backing and interlock individual stones across sheets to create a seamless, organic visual flow.
Engineer Your Shower for Lifetime Performance
A high-quality shower floor tile installation is an investment that seamlessly merges structural integrity, waterproofing science, and refined interior aesthetics. By selecting low-absorption materials, enforcing precise slope angles, and utilizing modern waterproofing membranes, you protect your home’s structural framing while enjoying a durable, spa-like sanctuary for decades to come.
Are you planning a bathroom remodel or fixing an old shower base? What tile materials or drainage systems are you considering for your project? Drop a comment below with your technical questions or share your installation experiences—I’d love to help you build a leak-free shower!