
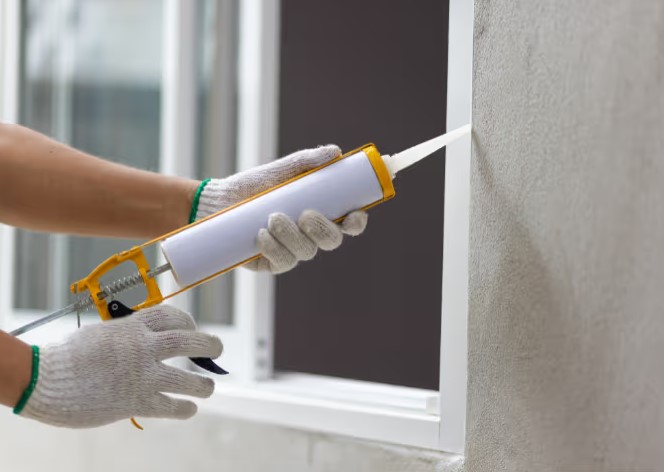
Source:https://renoquotes.com
You have just finished spending three weekends straight tiling a gorgeous new walk-in shower. The grout lines are straight, the accent tiles look amazing, and you are on the final step: running a line of silicone sealant along the base. You grab a cheap, four-dollar metal skeleton gun from the bottom of your toolbox, squeeze the trigger, and—splat. A giant, jagged glob of white goop erupts across your brand-new tile, followed by a runny, uncontrollable trail of mess. Within five seconds, a masterpiece looks like a messy DIY disaster.
In my 10+ years of remodeling kitchens, bathrooms, and exterior trim, I have seen more projects ruined by bad caulking than by bad carpentry. Homeowners spend thousands on high-quality materials, only to cheap out on the one tool that seals the entire envelope.
A flawless bead of sealant isn’t a matter of luck or a magical steady hand. It is entirely about mechanical control. Upgrading your workflow to a professional-grade caulk gun pro setup changes everything, turning a frustrating chore into an incredibly satisfying art form.
The Physics of Smooth Flow: Why Upgrading Matters
Think of a budget caulk gun as a rusty old bicycle with a loose chain; you stomp on the pedals, the frame flexes, and the bike jerks forward unpredictably. A professional caulk gun pro, on the other hand, is like a premium sports car with a dual-clutch transmission. Every ounce of pressure you apply to the trigger translates instantly, smoothly, and precisely to the piston inside the tube.
When you use a low-end skeleton gun, you are fighting a low thrust ratio. Thrust ratio is the mechanical advantage of the tool—how much pressure is applied to the sealant tube for every pound of force you exert on the trigger.
Cheap guns usually have a 4:1 or 10:1 ratio, which forces you to squeeze with white-knuckle intensity just to get thick sealants out. A professional tool jacks that up to 18:1 or even 26:1. This means you can distribute high-viscosity sealants with the gentle squeeze of two fingers.
Decoding the Anatomy of a Pro-Level Applicator
To help you graduate from a beginner to an intermediate pro, let’s look at the mechanical features that separate a hardware-store bargain from a legitimate industrial tool.
1. High Thrust Ratio & Drip-Free Mechanisms
If you are working with thick materials like polyurethane construction adhesives, structural sealants, or pure silicone, a high thrust ratio is non-negotiable. Furthermore, look for a caulk gun pro that features a automatic drip-free or pressure-relief function. The moment you let go of the trigger, the internal drive dog instantly backs off the pressure plate, stopping the flow of sealant instantly so it won’t bleed all over your floor.
2. Smooth Friction Feed vs. Ratchet Rods
If your current caulk gun has a notched rod that clicks loudly every time you squeeze the trigger, get rid of it. Those notches mean the piston can only advance in fixed increments. A pro-level gun uses a smooth, round friction rod. This allows for infinitely adjustable, continuous advancement, which is the only way to get a perfectly uninterrupted line.
3. Ergonomic Composite Construction
A solid steel gun feels heavy after twenty minutes of sealing crown molding along a ceiling. High-end modern applicators use advanced lightweight composite frames. They reduce wrist fatigue while remaining structurally rigid enough to survive dropping off a ten-foot ladder onto concrete.
+------------------------+---------------------------------+-----------------------------------+
| Feature                | Standard Economy Skeleton Gun   | Premium Caulk Gun Pro             |
+------------------------+---------------------------------+-----------------------------------+
| Thrust Ratio Range     | 4:1 to 10:1 (Low leverage)      | 18:1 to 26:1 (High leverage)      |
| Rod Design             | Ratchet style (Notched/Jerky)   | Friction drive (Smooth/Seamless)  |
| Pressure Release       | Manual thumb lever required     | Automatic drip-free backing       |
| Viscosity Compatibility| Only thin latex/acrylic caulks  | Heavy polyurethanes & silicones  |
+------------------------+---------------------------------+-----------------------------------+
Technical Prep: The Unspoken Rules of Bead Perfection
Even if you possess the absolute best caulk gun pro on the market, your sealant will fail prematurely if your substrate preparation is subpar. Water, old residue, and invisible oils are the mortal enemies of proper chemical adhesion.
1. Total Eradication of the Old Bead
Never, under any circumstances, apply new caulk directly over old caulk. The new material will not bond properly, creating a hidden pocket where mold and mildew thrive. Use a razor scraper or a dedicated pulling tool to strip the joint down to the bare substrate, then wipe the track down with isopropyl alcohol to remove lingering moisture and soap scum.
2. The Golden Angle of Cutting the Nozzle
Look at the plastic tip of your sealant tube. Beginners usually cut the tip straight across, creating a circular opening. Instead, cut the nozzle at a sharp 45-degree angle using a sharp utility knife. The width of your cut should match the width of the gap you are filling.
Pro Tip: Keep the opening small at first. You can always trim more off if the gap is wider, but you can’t put the plastic back on if you cut it too wide!
The “Spit-Shine” Trap
We have all seen videos of people smoothing out a bead of caulk using a bare finger dipped in soapy water or saliva. If you are working with advanced polyurethane or pure silicone sealants, do not do this. Saliva introduces human bacteria directly into the wet sealant, locking it underneath the surface where it turns into black mold over time. Instead, use a dry, profiling caulking tool or wear a tight nitrile glove sprayed lightly with denatured alcohol for a pristine, sanitary finish.
Execution Mastery: Pulling the Perfect Bead
Once your joint is clean and your tube is loaded into your caulk gun pro, it’s time to execute. Consistency is key, and it requires coordinating two things: your hand speed and your trigger pressure.
-
Always Pull, Never Push: Hold your applicator at roughly a 45-degree angle relative to the joint, pointing the nozzle tip away from the direction you are moving. Always pull the gun toward you. Pushing the nozzle forward forces excess paste out around the sides, creating a chaotic mess.
-
Match Speed to Flow: If you move your arm too fast, the bead will stretch thin and pull away from the edges. If you move too slowly, the sealant will bunch up into heavy ridges. Watch the pocket of caulk forming directly behind the nozzle tip—keep that pocket uniform as you glide smoothly down the line.
-
The Seamless Reset: When you reach the end of your arm’s comfortable reach, don’t stop abruptly. Slowly ease off the trigger while continuing your hand motion for another inch to taper the line out naturally, allowing you to pick up the next section seamlessly.
Elevating Your Restoration Craft
At the end of the day, home improvement is a journey of small details. Taking the time to understand the mechanics of fluid delivery and investing in a professional caulk gun pro completely transforms your project results. You will save money on wasted materials, eliminate clean-up stress, and walk away with watertight, beautiful joints that hold up against the elements for a generation.
Over to You!
Are you getting ready to tackle a kitchen backsplash or draft-proof your exterior windows this weekend? Have you ever had a nightmare experience with a sticky, dripping bargain-bin caulk gun? Drop your questions, material dilemmas, or project wins in the comments below—let’s get your joints looking perfect!